Import Tool: New Features for Date of Birth, More Options for Data Handling, and Better Reporting
We've made important updates to the File Import Tool to help you import your case and client data more accurately, with better control and clearer reporting.
Whether you're uploading records for the first time or updating existing ones, these improvements are designed to save time and reduce data entry errors.
📅 Importing Dates of Birth (DOB)
🎂 Date of Birth Support in File Imports
When uploading client or case data, you can now include Date of Birth (DOB) in various formats. We support several common date styles, and you can select the right one from a dropdown menu.
Why it matters: This makes data imports more flexible and helps reduce formatting issues.

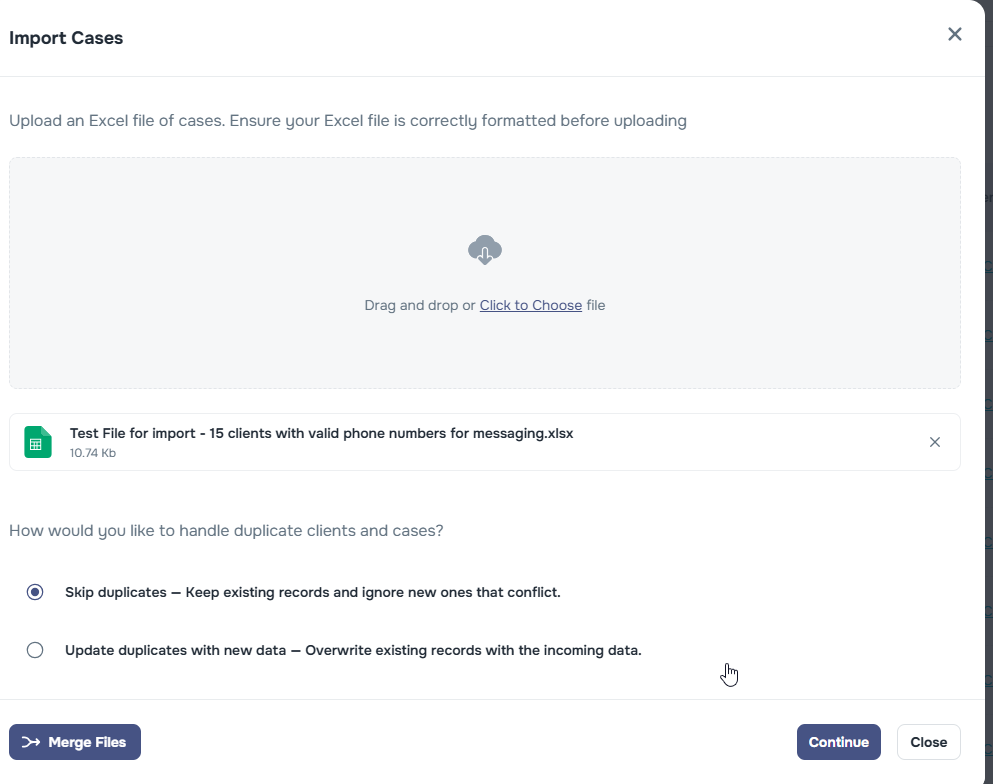
️ Smarter Import Options for Duplicate Records
We understand that duplicate data can create confusion, so we’ve introduced new controls to help you manage it better.
When importing cases or clients, you can now choose what happens to duplicates:
- Overwrite existing records – update existing clients or cases with new information
- Skip duplicates – leave existing records unchanged and only import new ones
This gives you greater flexibility and prevents accidental overwrites.
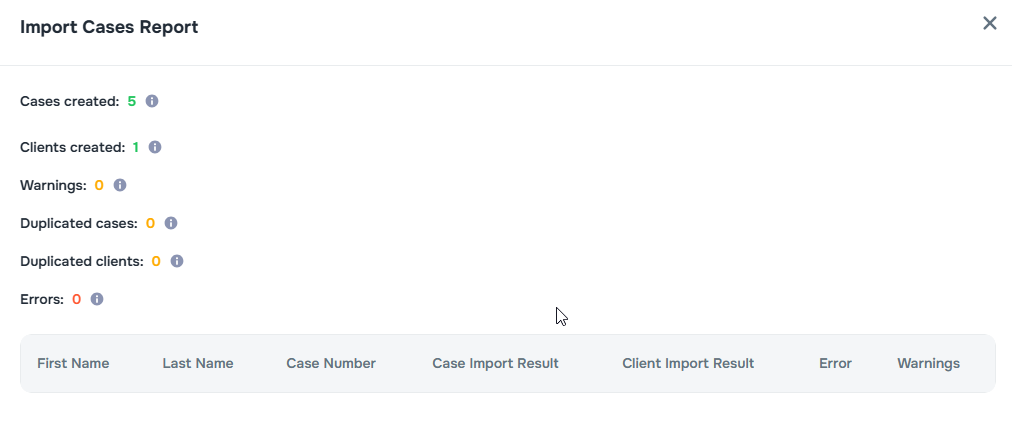
Clearer Import Results and Reporting
Once your file is uploaded, the tool now provides an easier-to-read summary of what happened during the import.
You’ll see counters for:
- ✅ Cases created
- ✅ Clients created
- ⚠️ Warnings (non-critical issues to review)
- 🔁 Duplicate cases found
- 🔁 Duplicate clients found
- ❌ Errors (entries that couldn’t be imported)
💡 Why it matters: These summaries help you quickly understand the outcome of your import, identify any issues, and take action if needed — all without needing a technical background.
Import Report Details Tab
The Import Report now includes a Details tab so you can review what happened for each processed row.
Each detail row includes:
- source row number from the uploaded file
- entity type (Case or Client)
- action performed (Created, Updated, Skipped, or Failed)
- reason when available (for example, duplicate detection or validation errors)
- updated field changes with previous and new values when available
If a large import produces more detail rows than the report view can show at once, the page displays how many rows are currently shown.
Edit Custom Field Rows During Import
When you review unmapped columns, you can now manage custom-field rows directly in the importer instead of restarting the mapping step.
You can now:
- add a new custom-field row from the importer
- choose which CSV column that row should use
- map the row to an existing custom field key
- clear or delete the row and reuse that CSV column somewhere else
Why it matters: This makes it easier to correct mappings while you are already in the importer, especially when a column should become a custom field instead of a standard field.
How to Map Multiple Emails and Phone Numbers
If your file has more than one email or phone column, you can map all of them during the Set up step.
Step-by-step
- Find the Email or Phone Number row in the mapper.
- Click Add another email or Add another phone number.
- Select the correct CSV column for each added row.
- For phone rows, choose the correct Phone Type (for example: mobile, home, work, office, landline, fax, or other).
- Use Set primary on the row that should be saved as the client’s main email or main phone.
- If you added a row by mistake, click Remove.
Practical tips
- Pick a primary row that is most reliable in your source system.
- If only one row is mapped, that row is treated as primary automatically.
- Keep mapping labels consistent across imports to reduce cleanup work later.