Zapier Integration Guide - Must be Completed to Activate Zapier in Kayse
Welcome to the guide for integrating Zapier with Kayse!
Zapier allows you to connect Kayse with thousands of other apps — no coding required. With just a few clicks, you can automate workflows like creating cases, sending messages, or syncing data with Google Sheets. Let’s get started 🚀
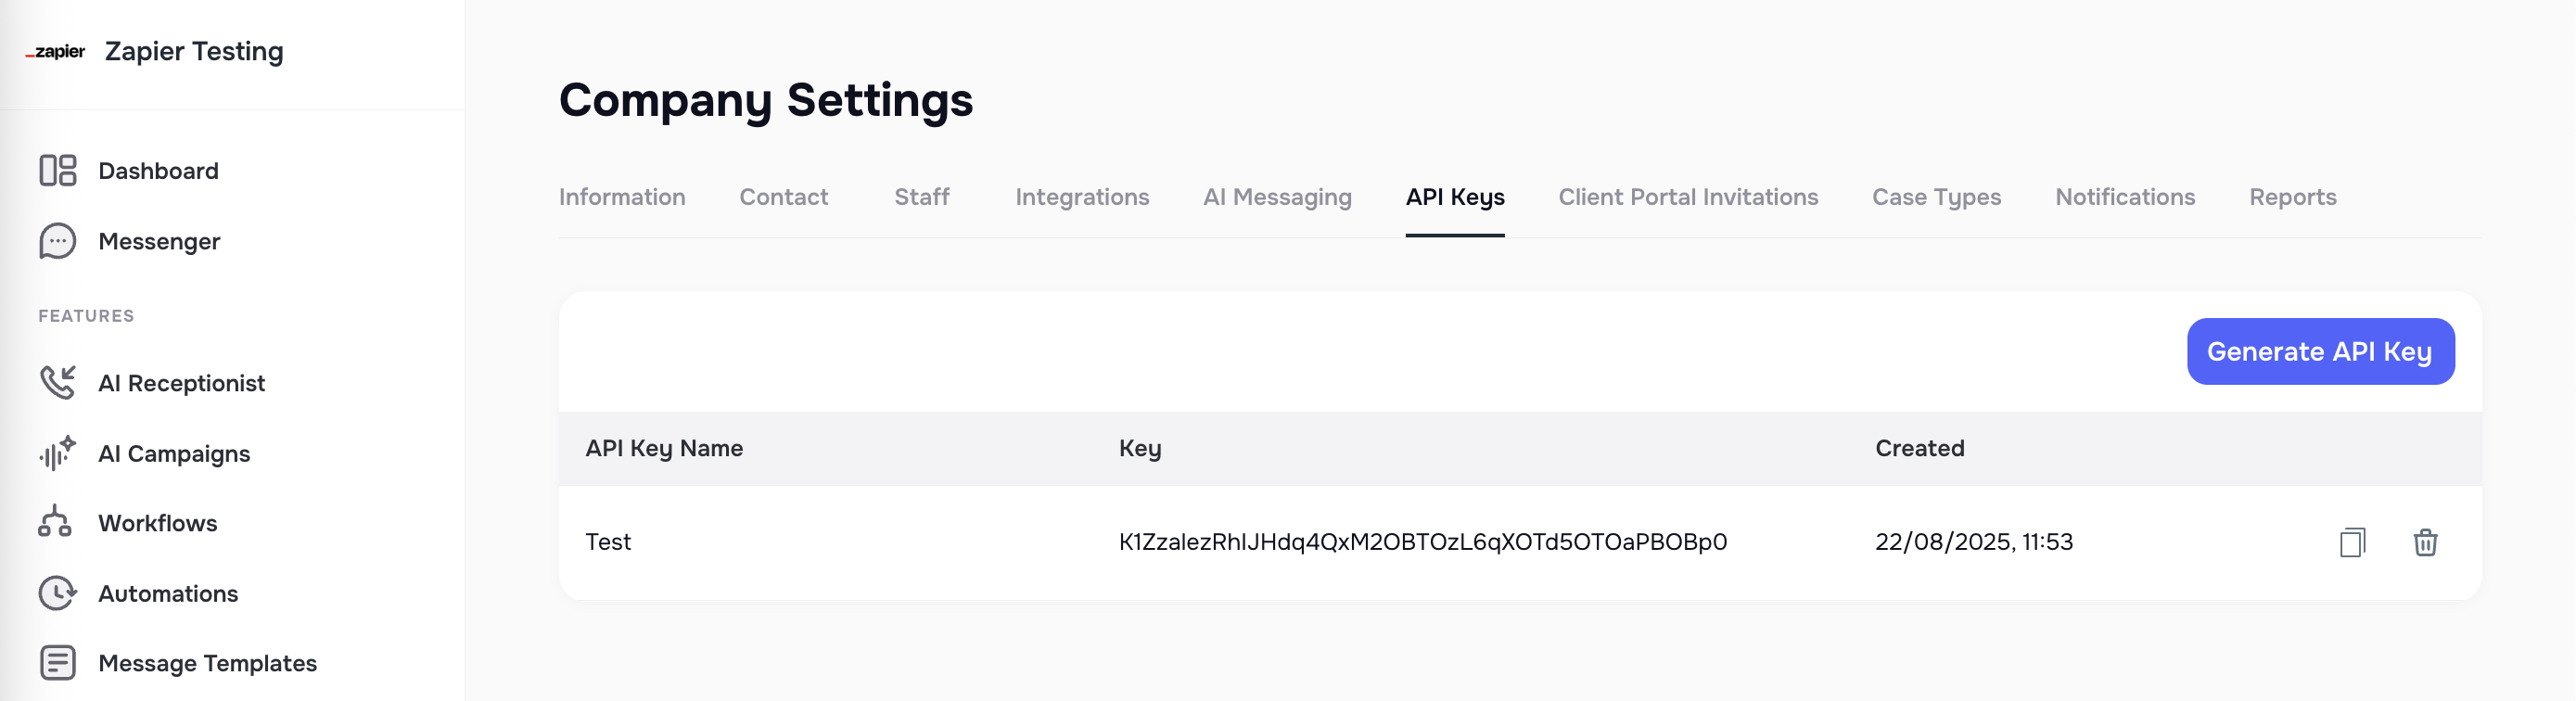
Step 1: Generate Your Kayse API Key
Before connecting to Zapier, you’ll need an API key from Kayse.
- Log in to your Kayse account.
- Navigate to Company Settings → API Keys.
- Click Generate New API Key.
- Choose a descriptive name (for your own reference).
- Copy the generated key — you’ll need it in the next step.
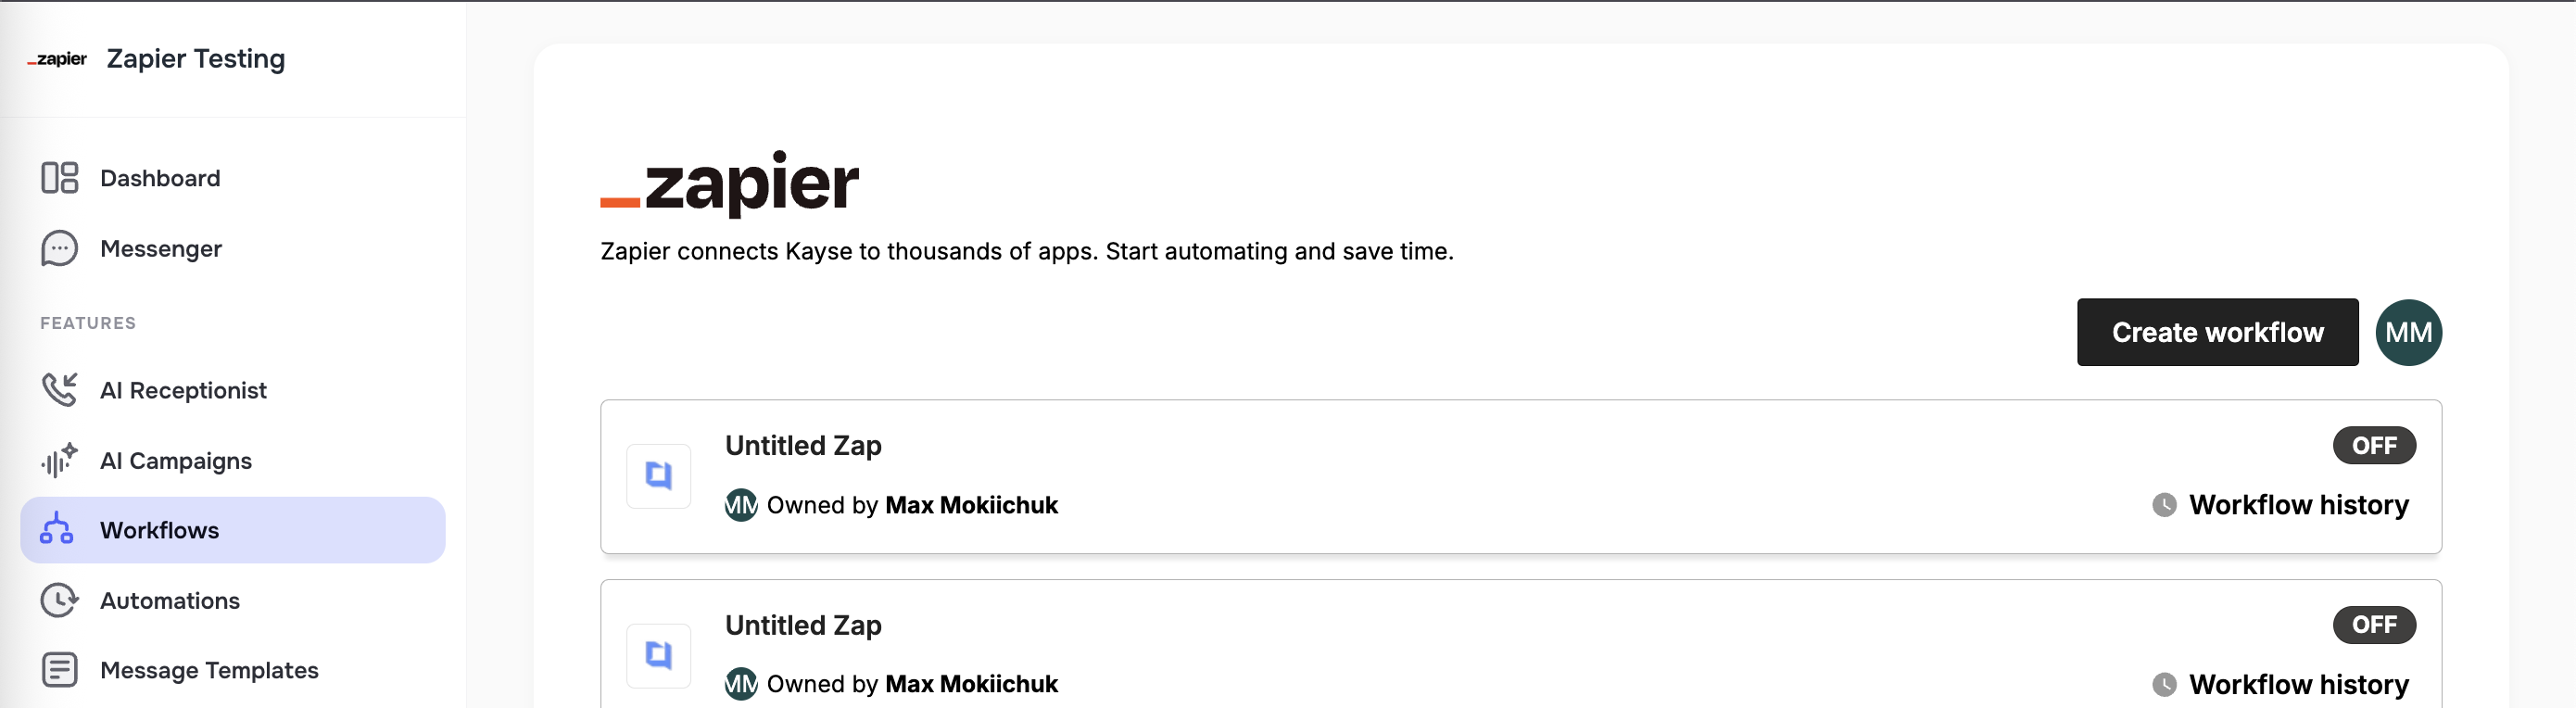
Step 2: Connect Kayse to Zapier (via Workflow tab)
The easiest way to connect Kayse with Zapier is directly inside your Kayse account.
- In Kayse, go to the Workflow tab in the left menu.
- You’ll see the Zapier integration page.
- Click Log In to connect your existing Zapier account.
- If you don’t have one yet, you can create it here.
- Once logged in, click Create Workflow.
- This will open the Zapier builder inside Kayse, where you can:
- Pick Kayse as your Trigger app.
- Connect your Kayse API Key (from Step 1).
- Build and test your Zap.
👉 You can also create Zaps directly from the Zapier dashboard, but we recommend doing it via Kayse Workflow tab — it’s faster, and your account connection will be automatically saved for future automations.
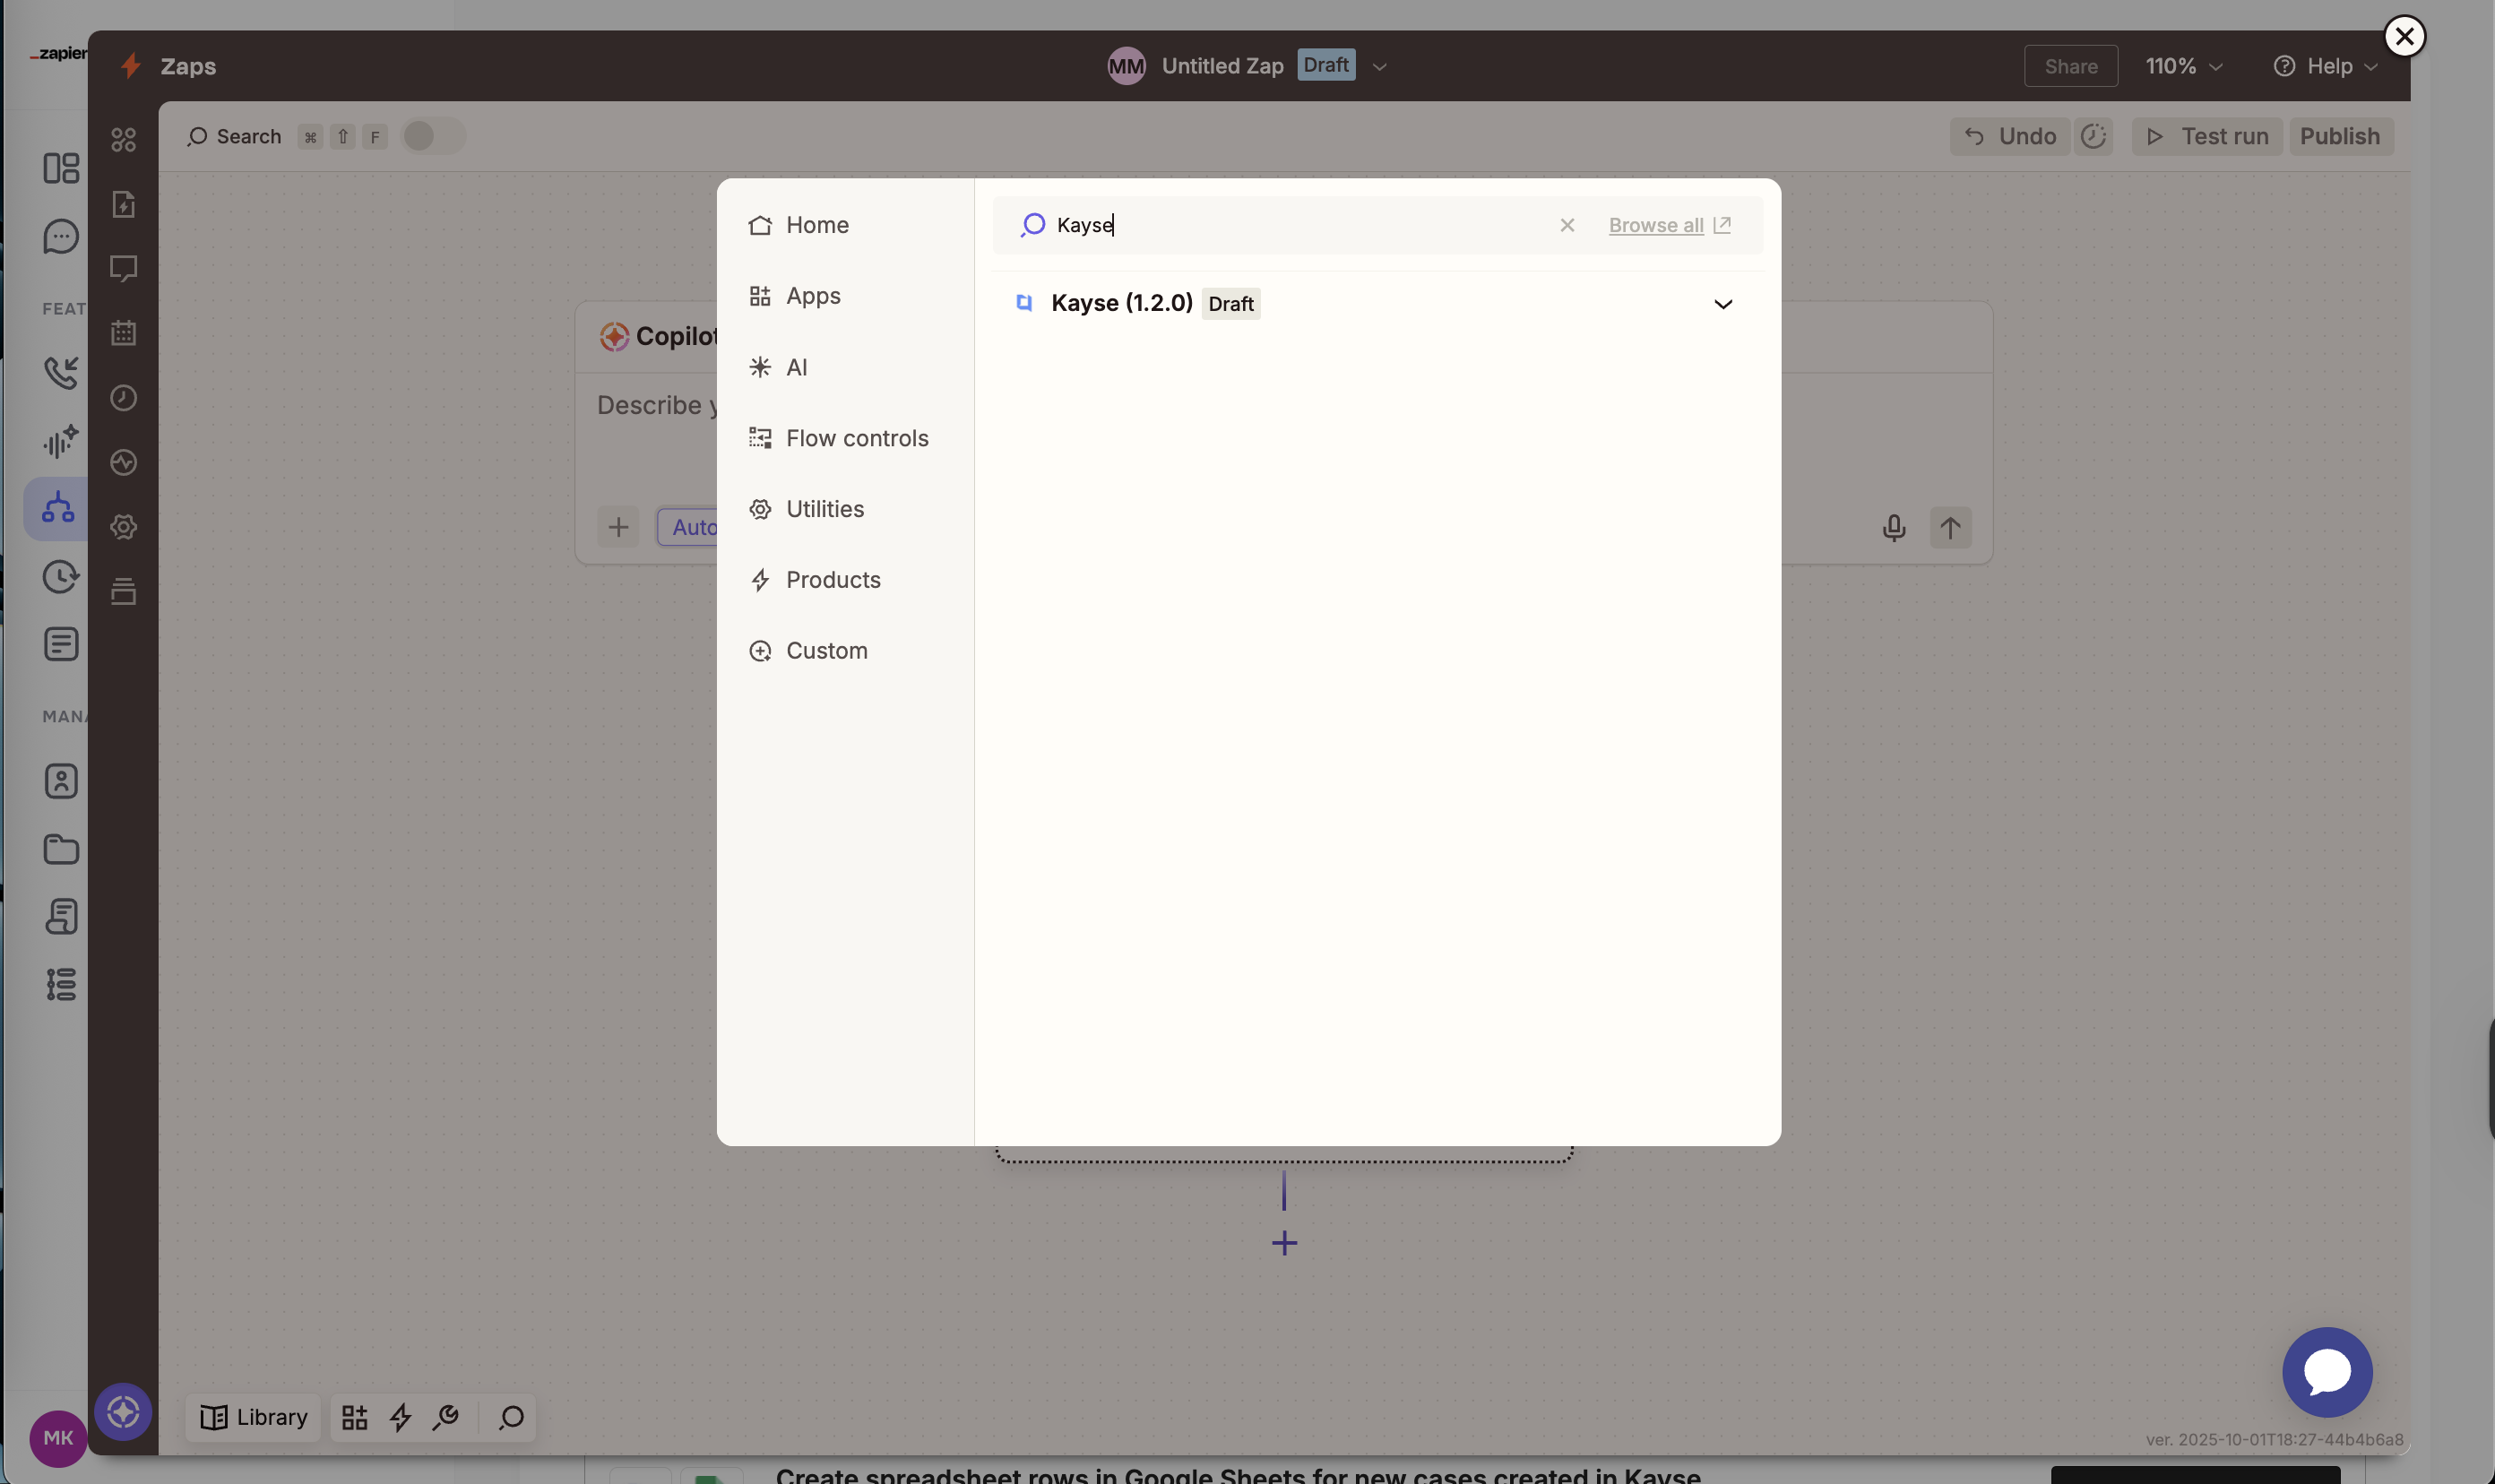
️ Step 3: Build and Configure Your Zap
Each Zap has:
- One Trigger (an event in Kayse that starts the Zap)
- One or more Actions (what should happen after the trigger)
Here’s how to configure it step by step:
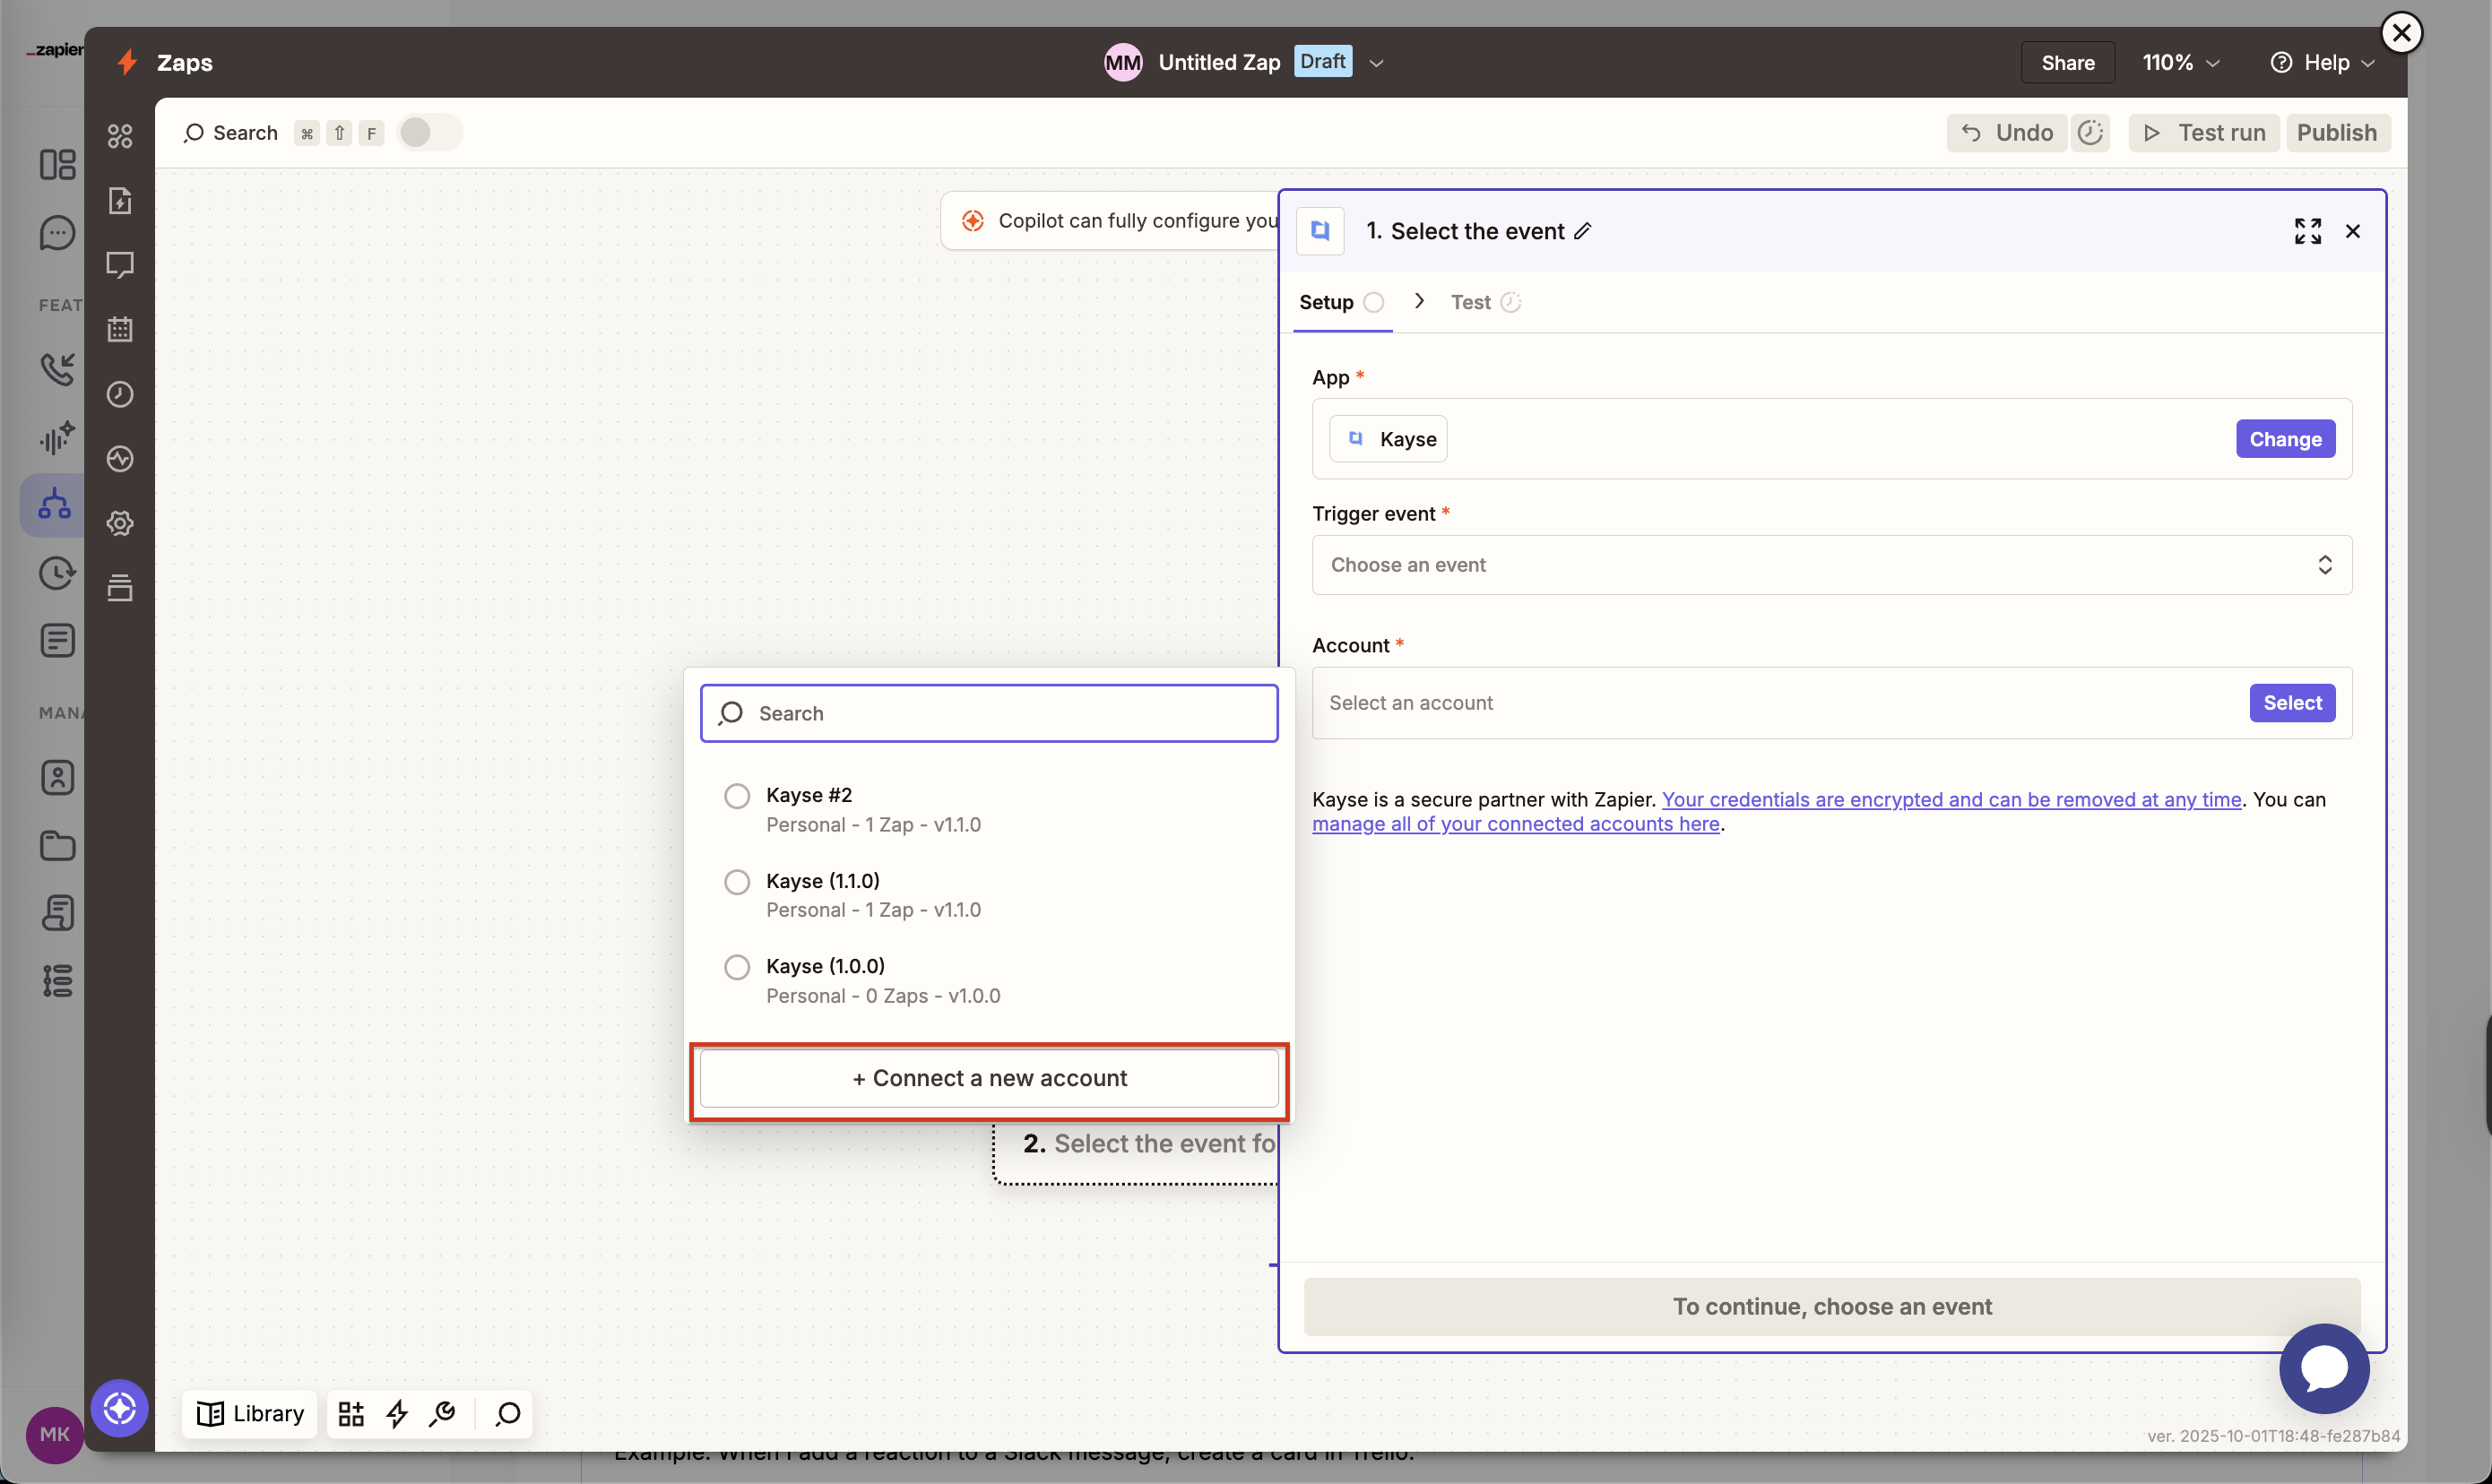
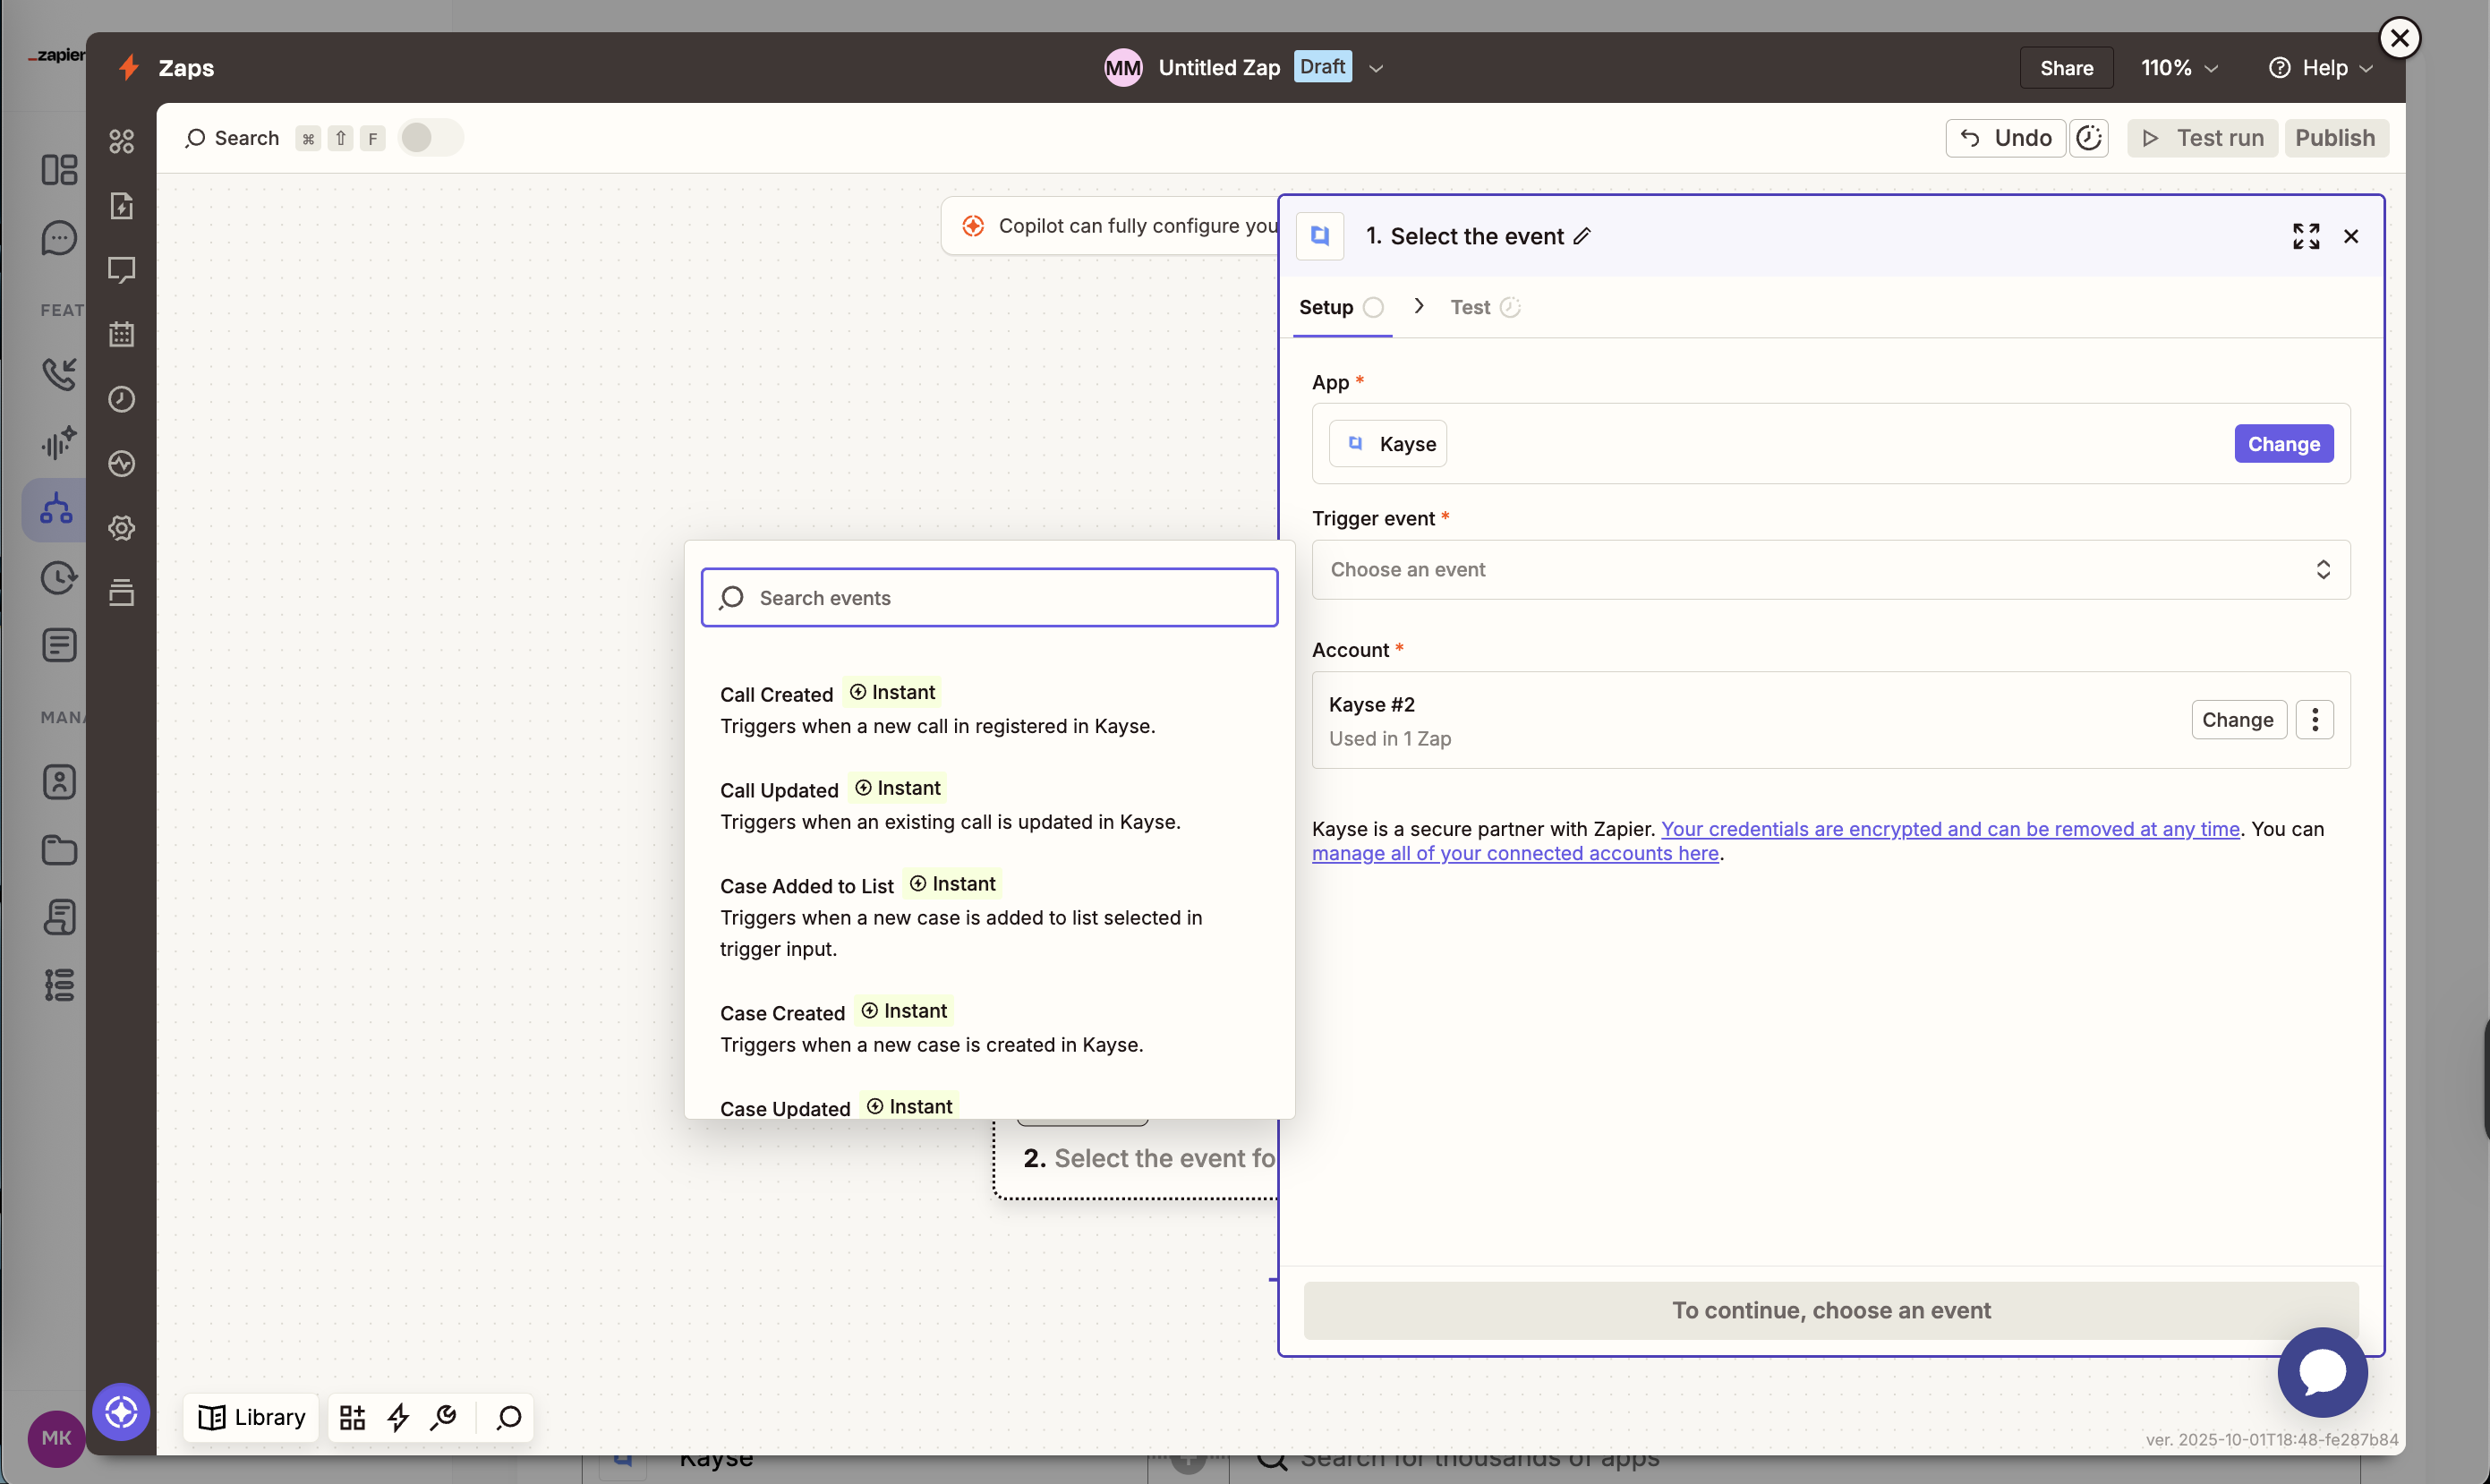
Choose a Trigger
- In the Zap builder, click on the Trigger block.
- Search for Kayse in the app list (like on a screenshot above).
- Choose your connected account (or connect a new one with the API key).
- Select the Trigger you want (e.g., Case Created).
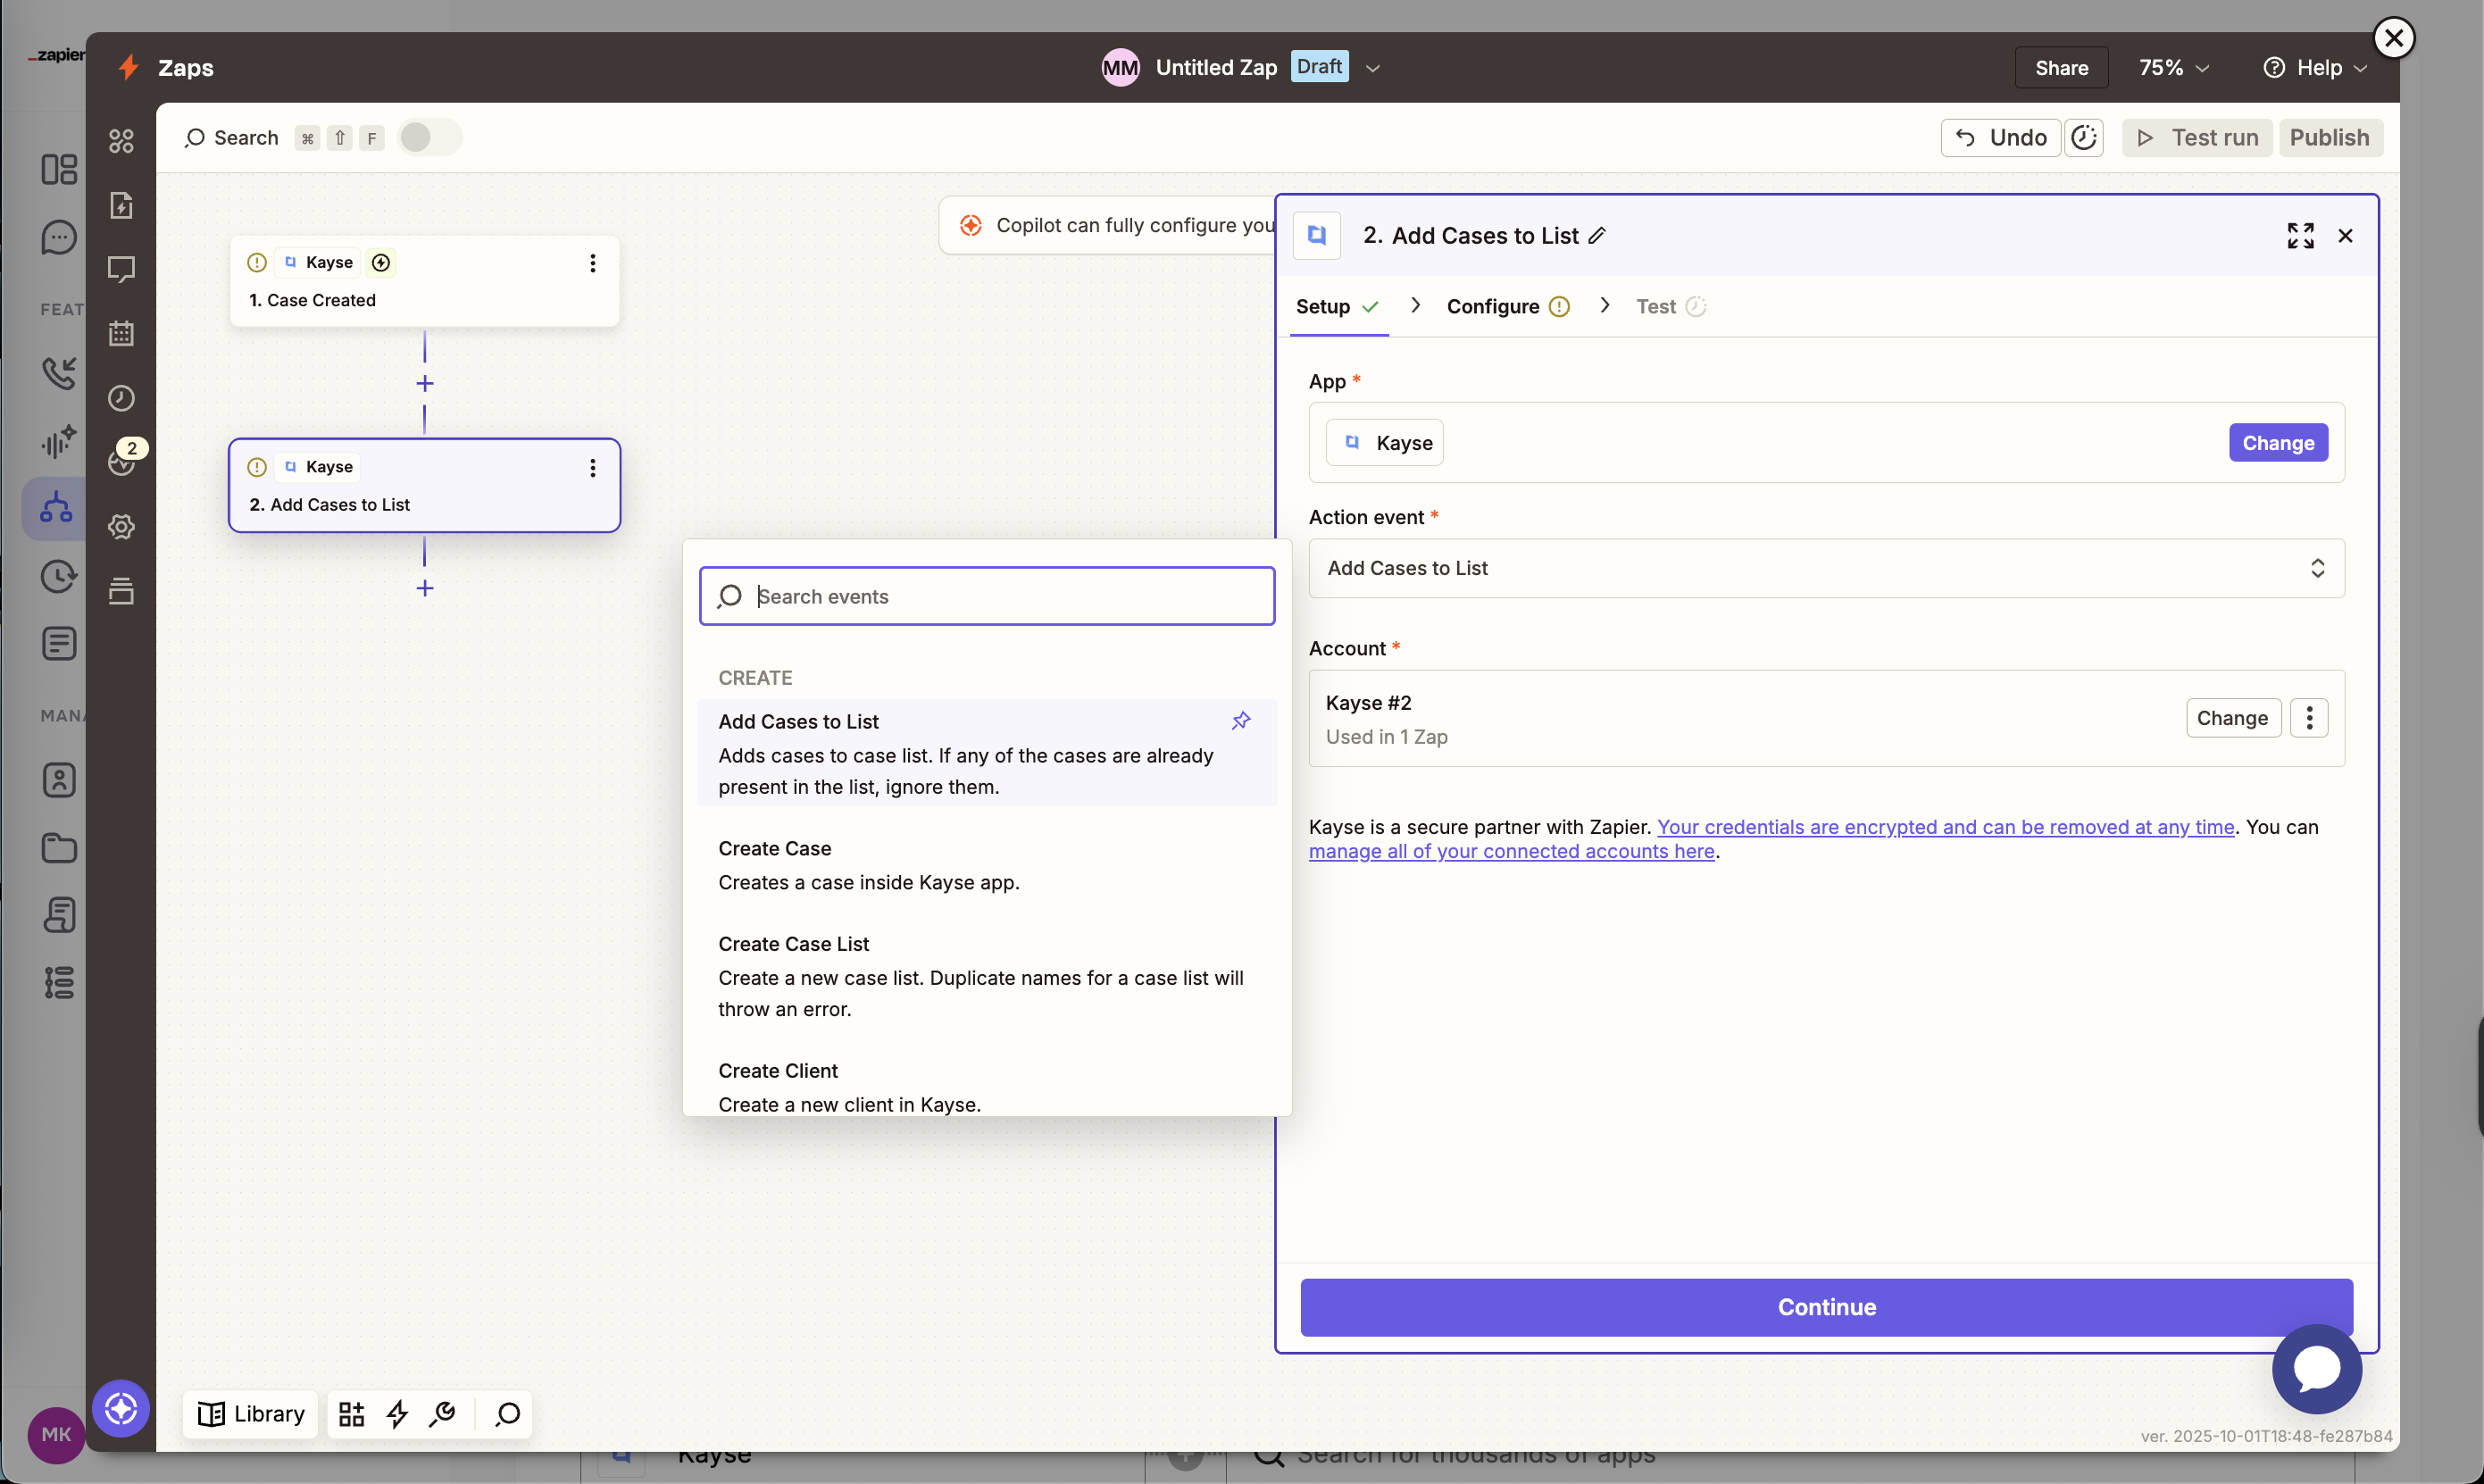
Add Actions
- Click on the Action block.
- Pick an app (Kayse or any of the 6,000+ Zapier integrations).
- Select what should happen (e.g., Create Client in Kayse, or Send Email in Gmail).
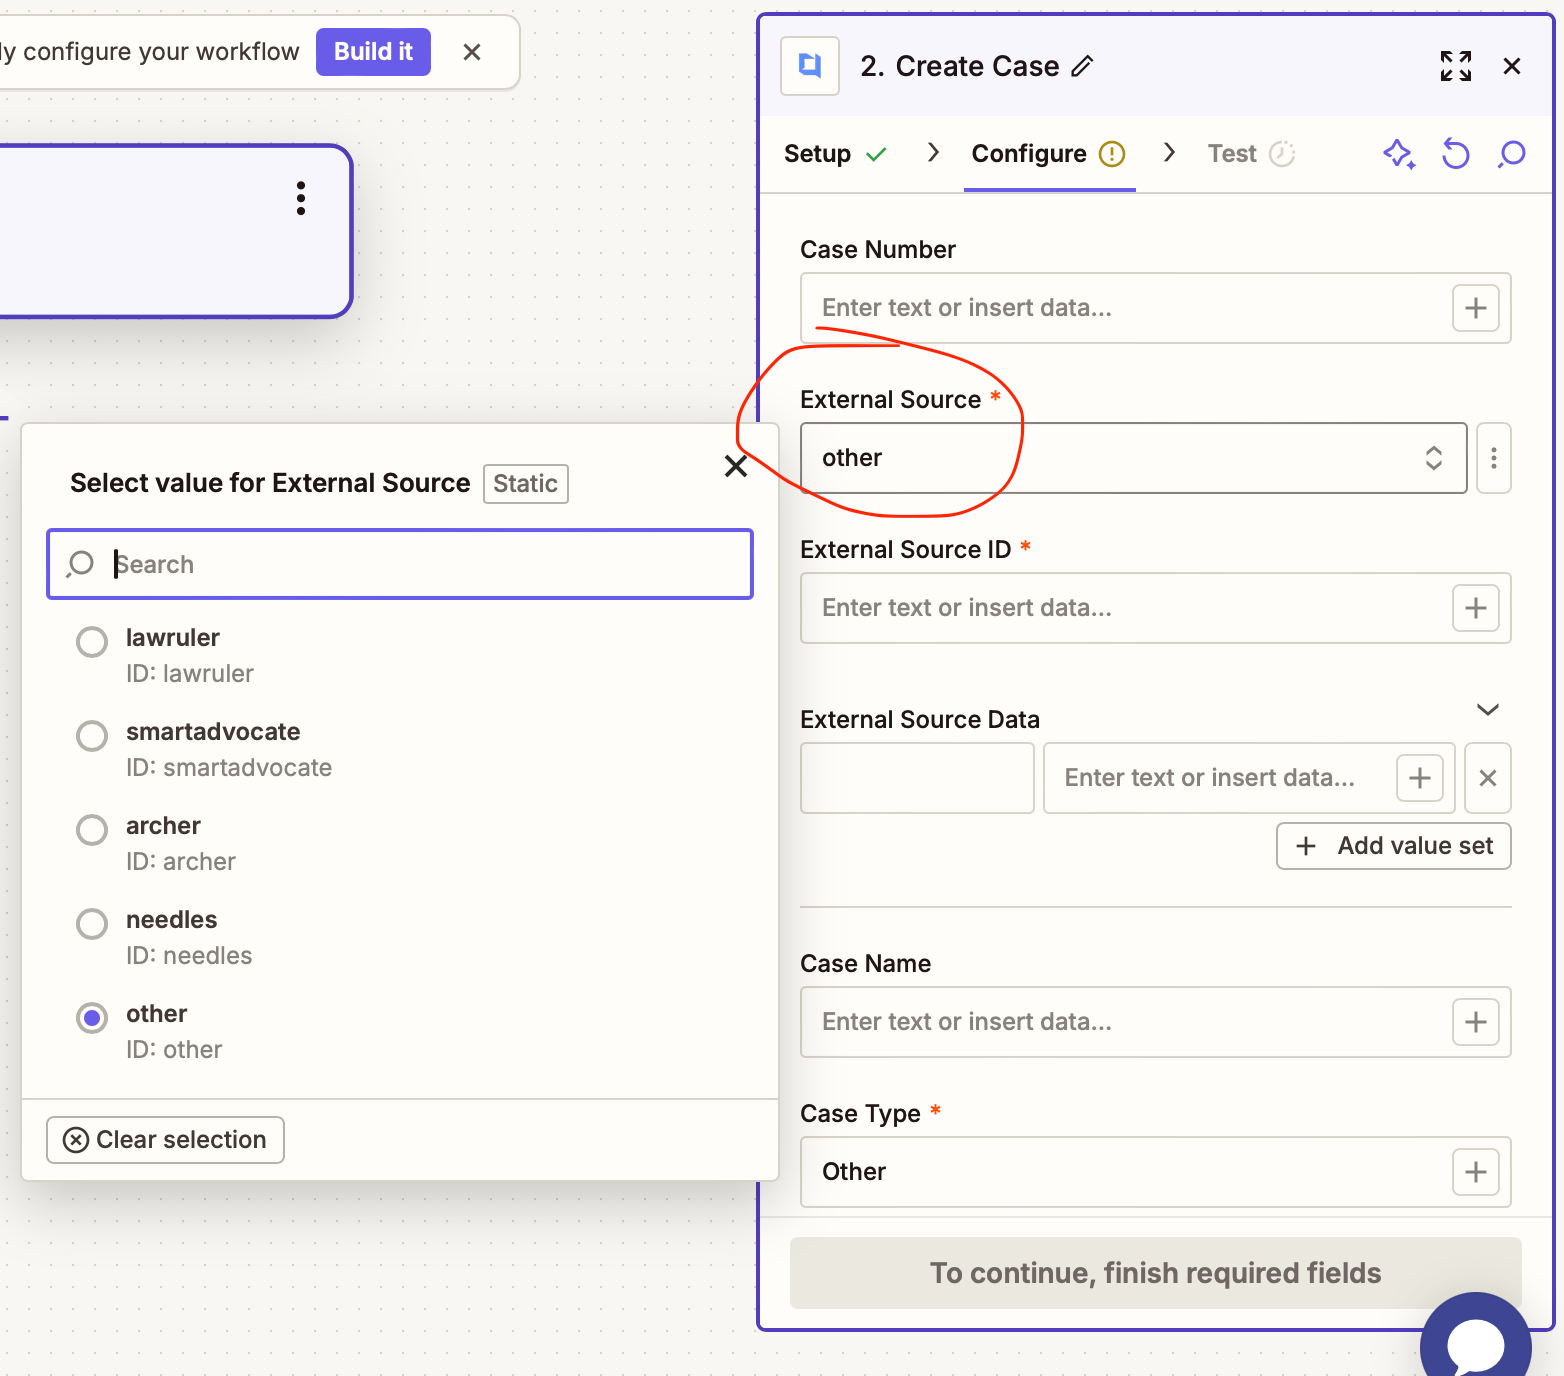
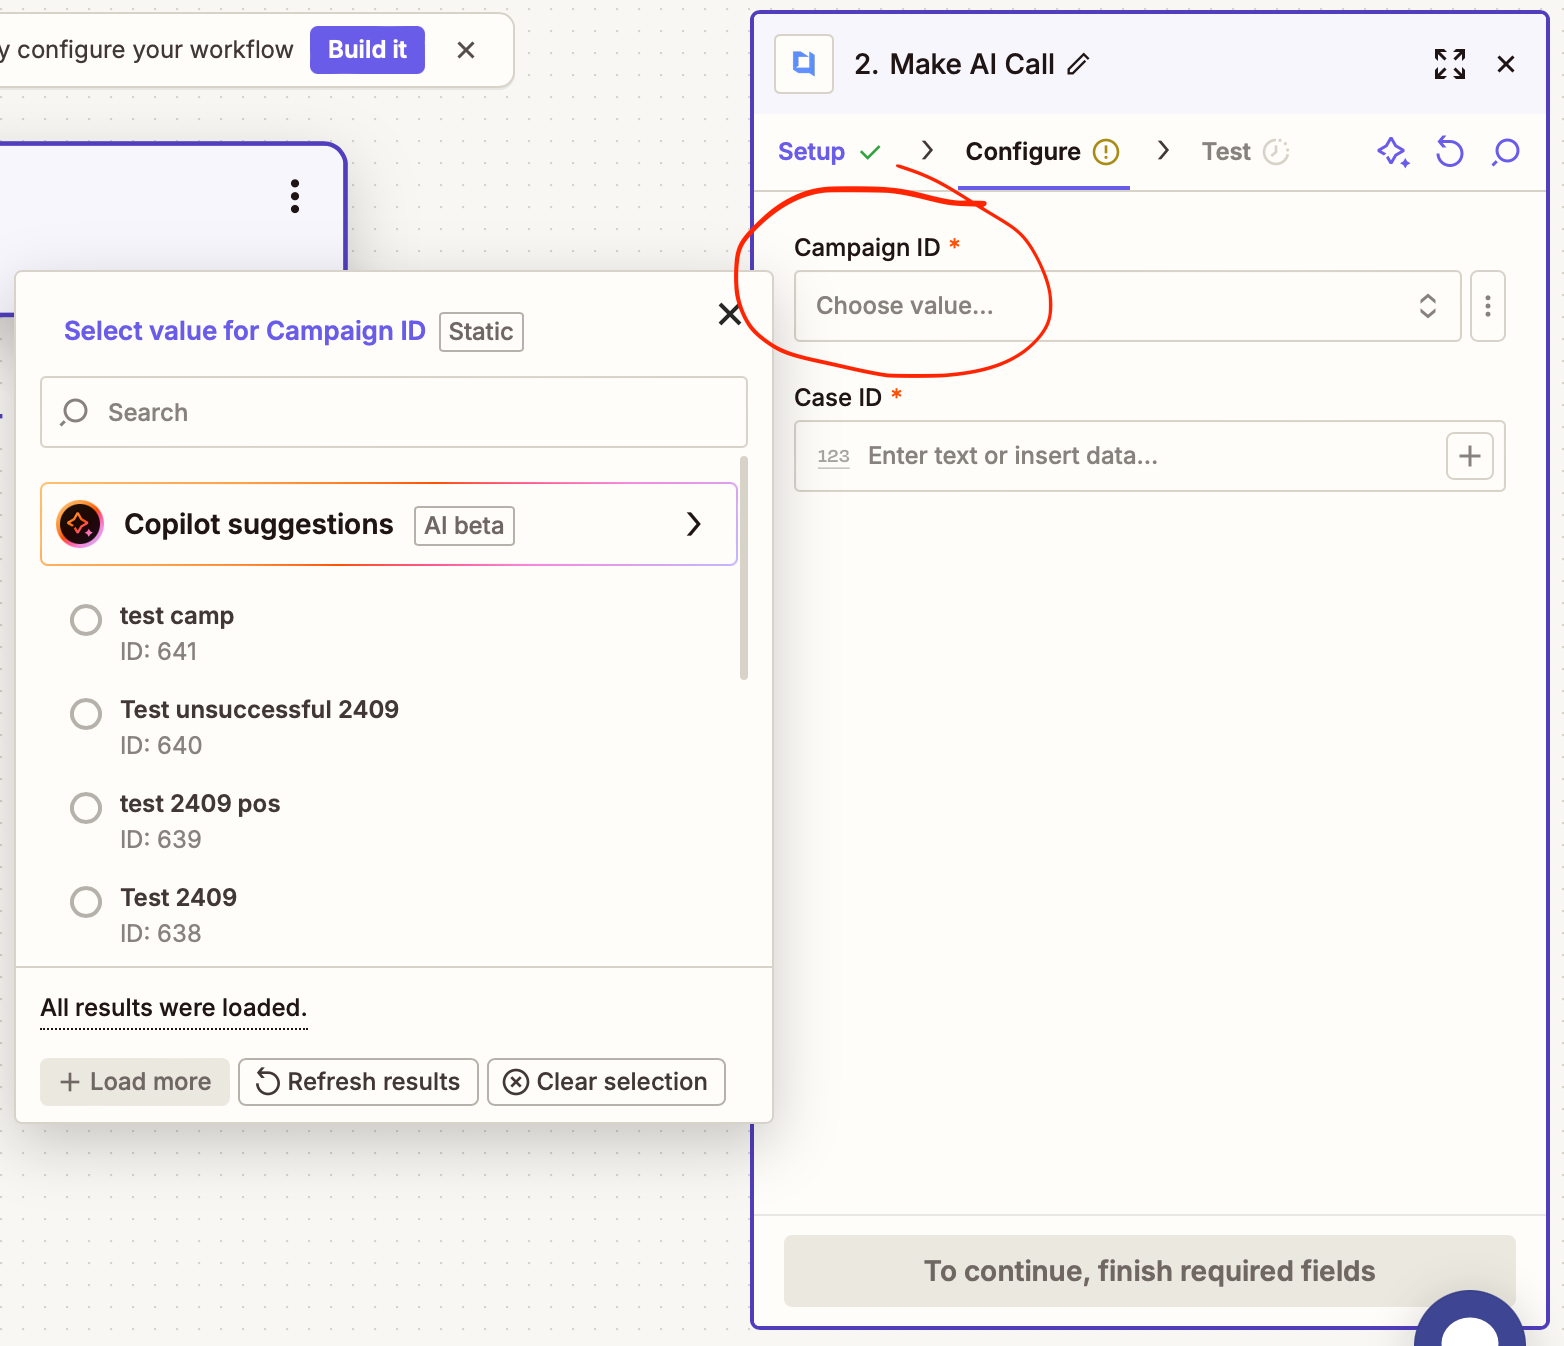
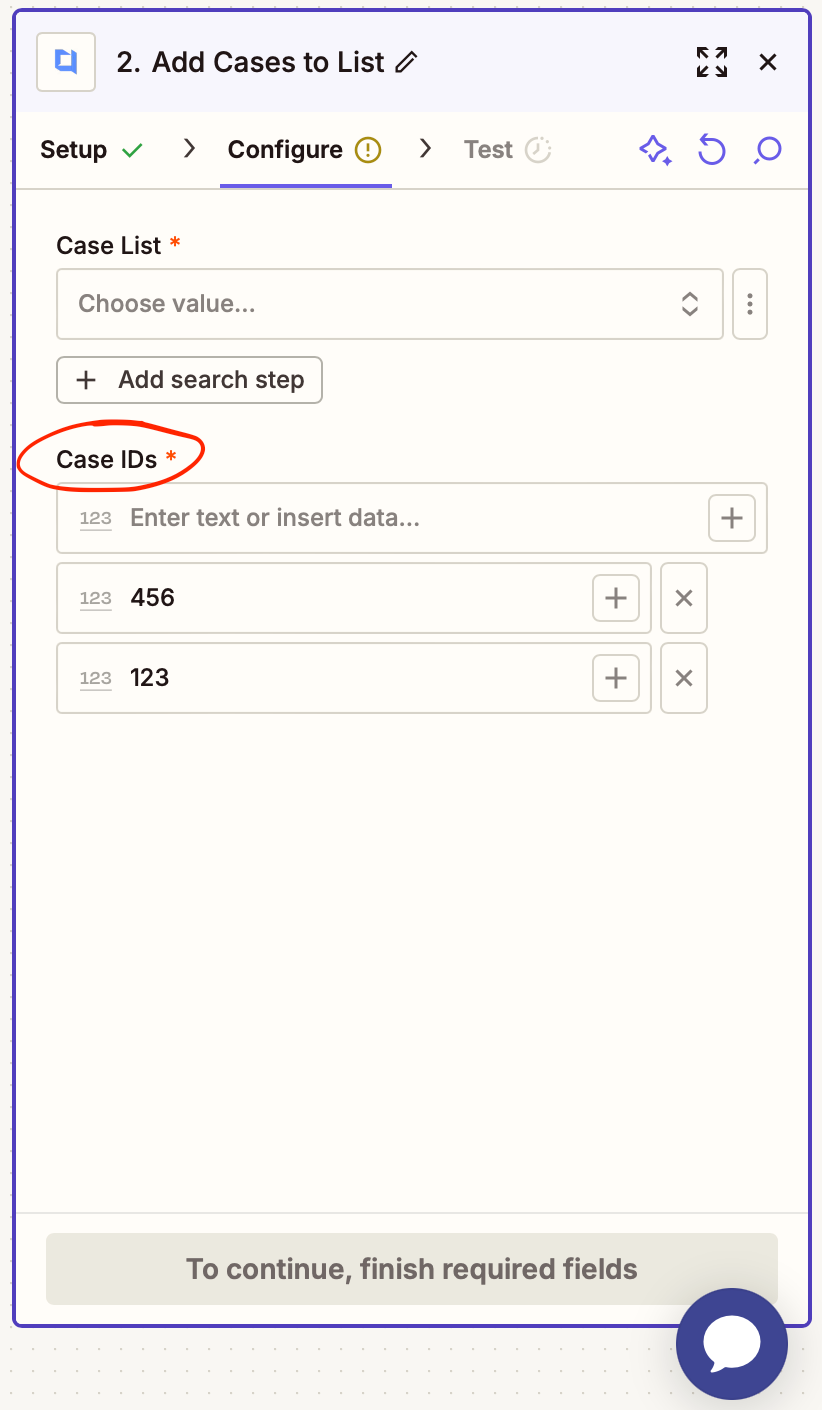
🔽 Field Types in Actions
When configuring an Action, you’ll see different kinds of input fields:
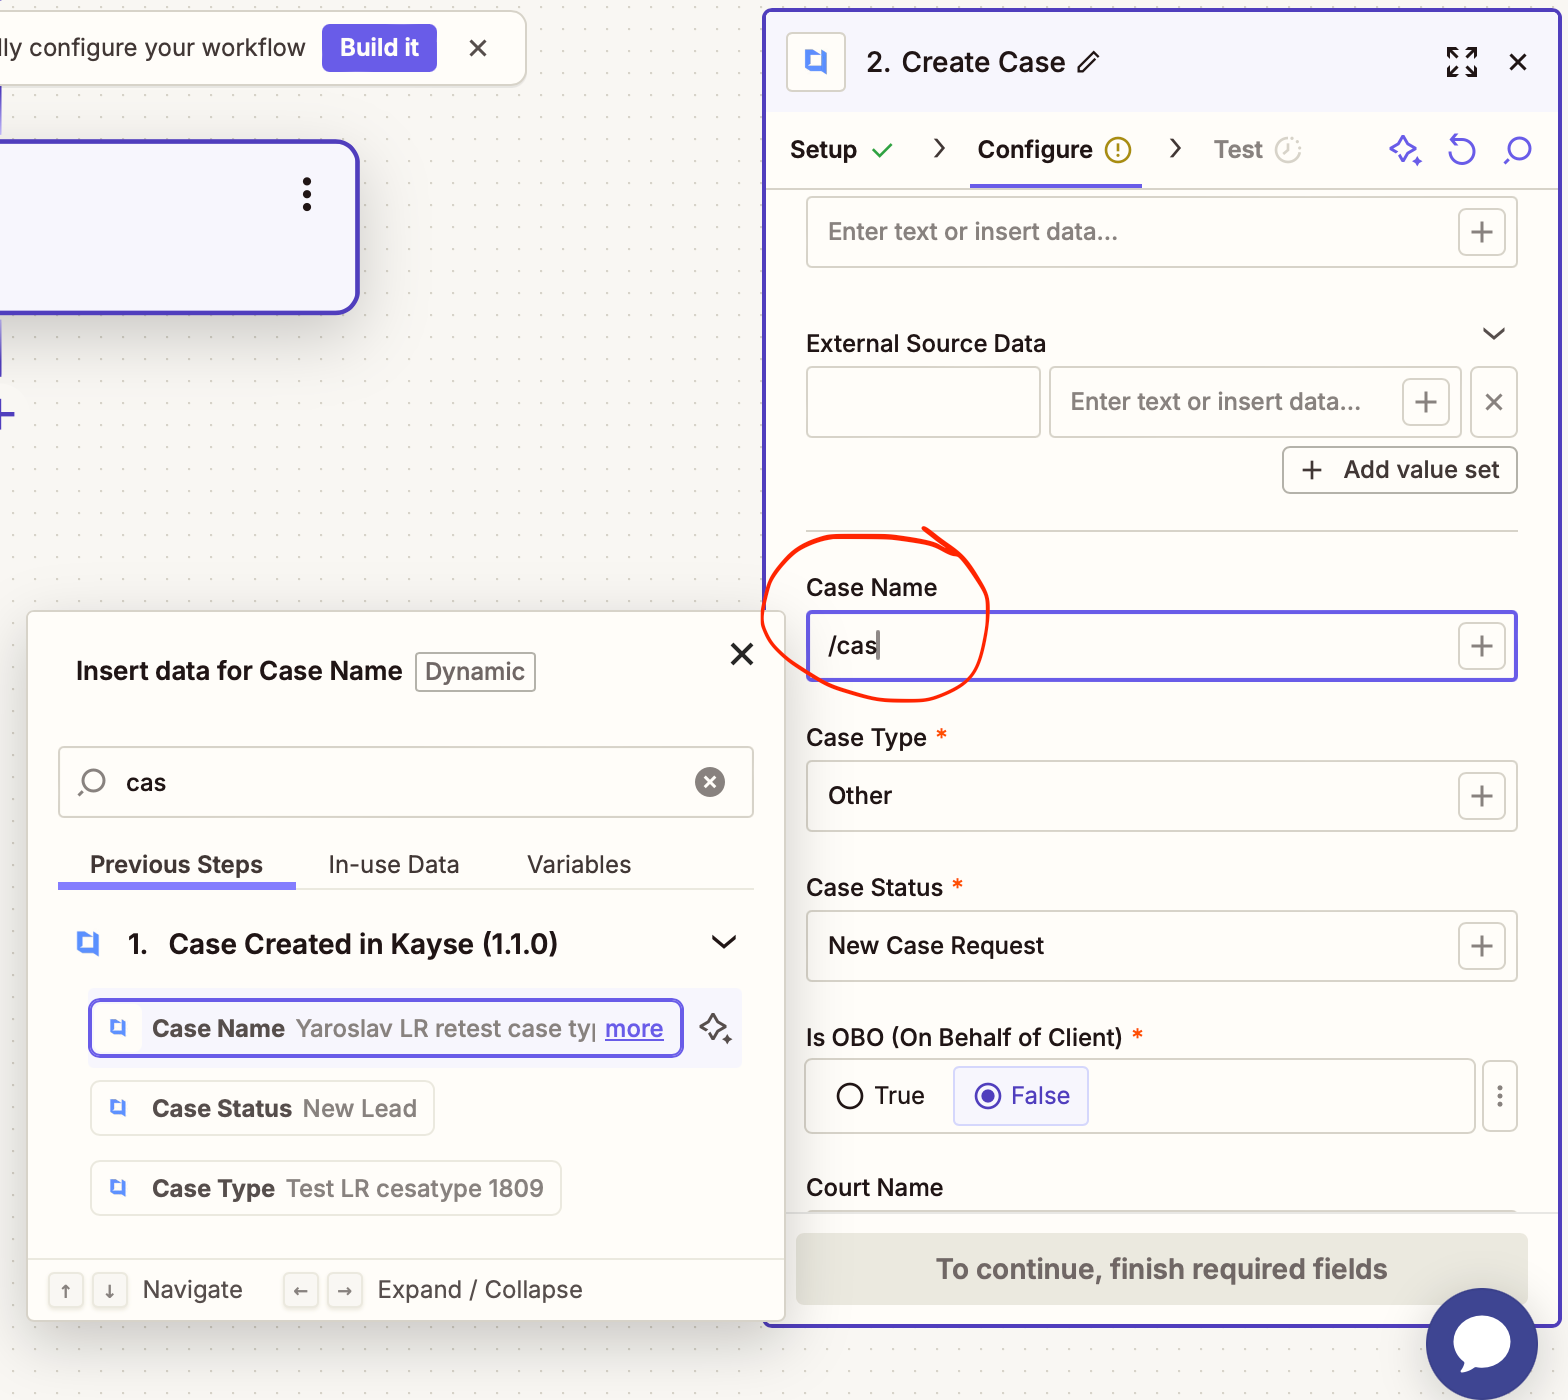
- Dropdowns
- Some are pre-filled (e.g., External Sources).
- Others are pulled dynamically from Kayse (e.g., Campaigns, Case Lists).
- You can set a fixed value or map it from the Trigger using the + button or / search.
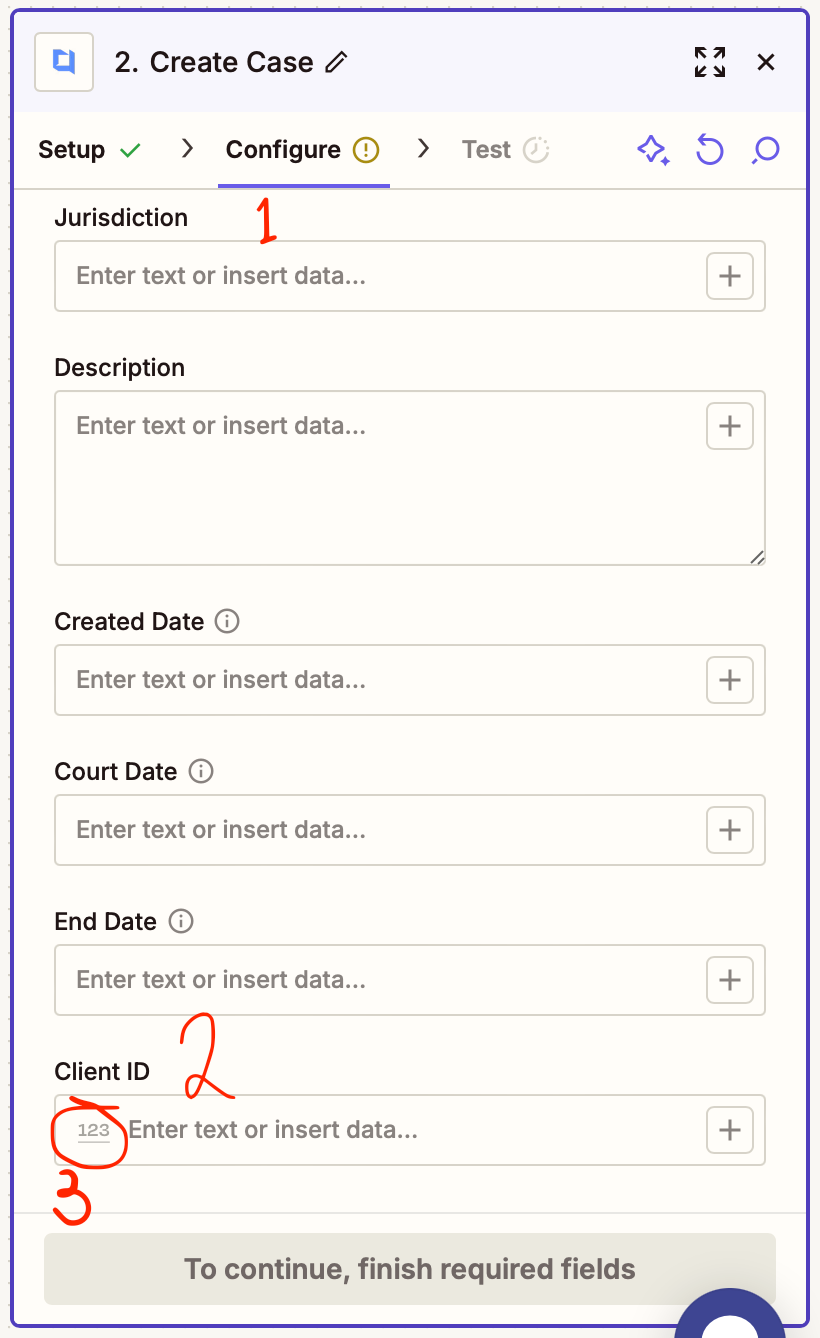
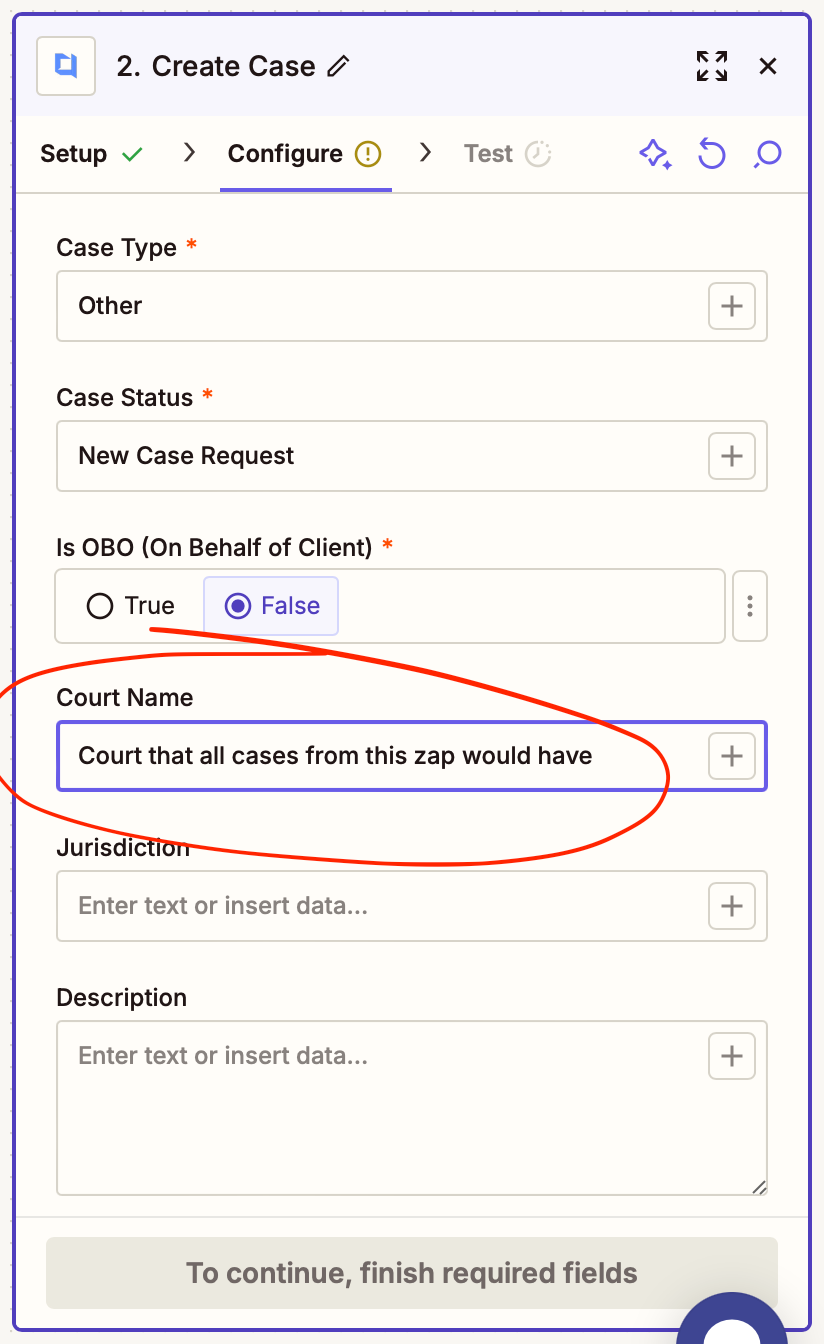
- Generic Fields
- Text, numbers, or dates.
- Can be filled manually or mapped dynamically from Trigger data.
⚠️ Grey placeholder data is only test data — it will be replaced with real values once the Zap runs live.
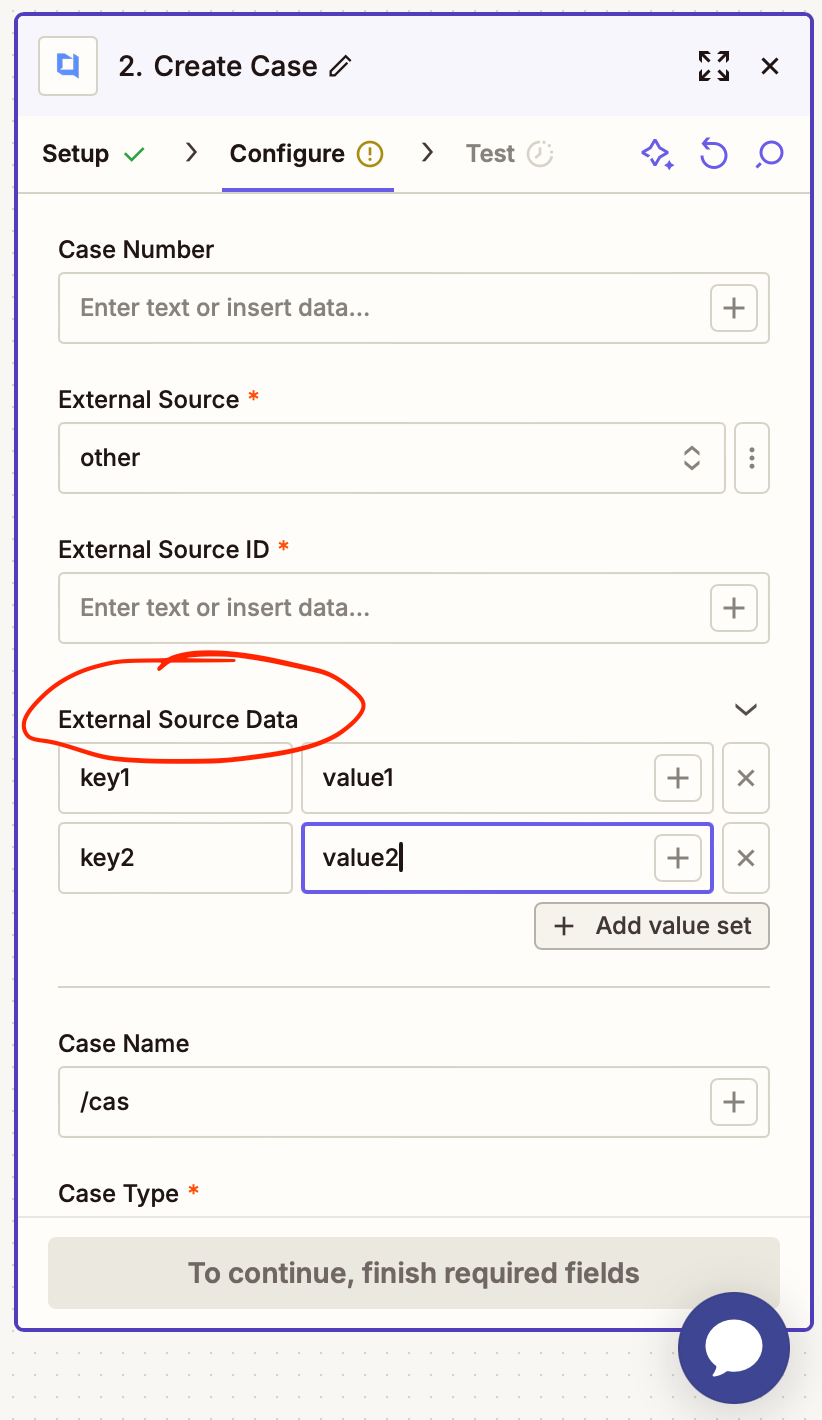
- Multi-Value Fields
- Some fields allow multiple entries.
- Key/Value pairs: use the + button to add more items.
- Multi-select lists: add several values at once.
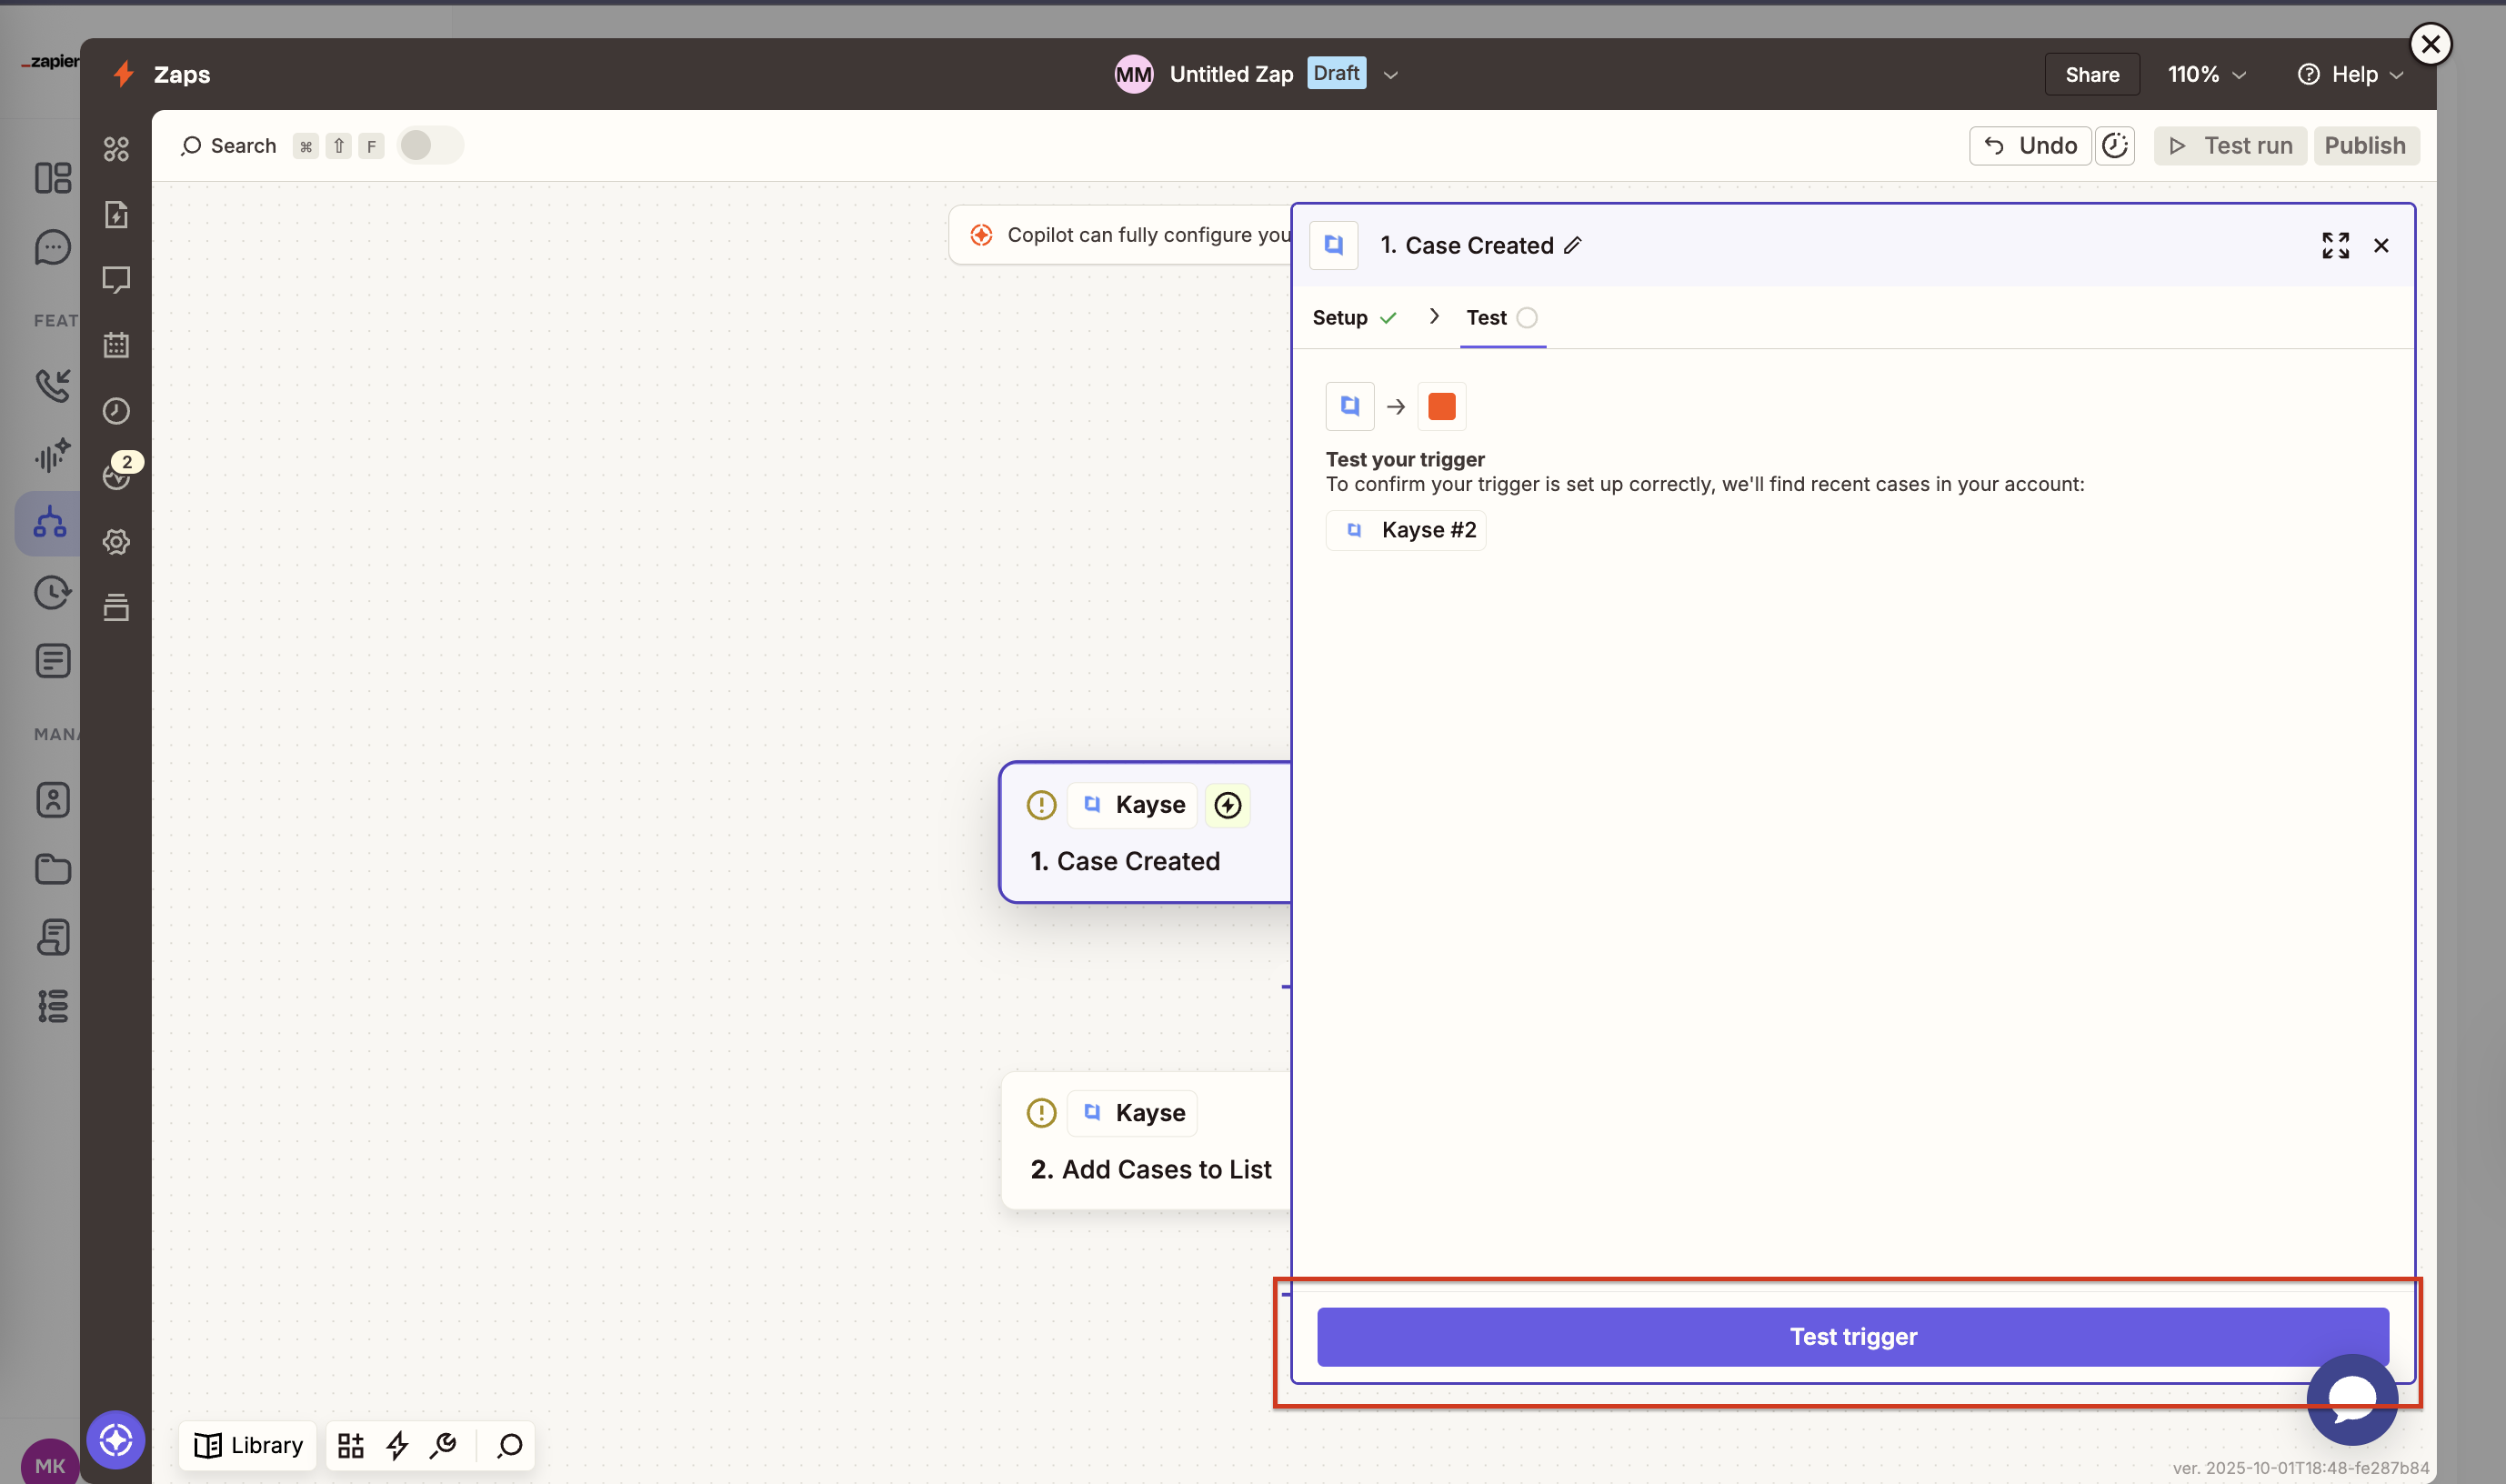
🧪 Testing & Publishing
- Fill in all required fields (marked with *).
- Run a Test to check data flow.
- Once successful, click Publish Zap.
- Your Zap will now subscribe to the trigger.
- From this point, every new event in Kayse will start the automation.

Example Use Cases
- When a Case is Created in Kayse → Add it to a Google Sheet → Notify your team in Slack.
- When a Client is Updated in Kayse → Update the client record in your CRM.
When a Document is Uploaded in Kayse → Save it automatically to Dropbox.
📚 Learn More
We’ve created additional guides for deeper details:
- 🔔 Zapier Triggers Guide — all available Kayse triggers (Case Created, Client Updated, Call Created, etc.)
- 🛠 Zapier Actions Guide — all available Kayse actions (Create Case, Update Client, Send Chat Message, etc.)
❓ FAQ
Q: How many apps can I connect?
A: Zapier supports 6,000+ apps — you can chain Kayse with most of them.
Q: Do I need to be an admin to set this up?
A: You need access to Company Settings in Kayse to generate an API Key.
Q: Can I test my Zap before publishing?
A: Yes — Zapier will walk you through testing each step before activation.
✨ That’s it! You’re ready to automate with Zapier and Kayse.
If you need help, contact our support team anytime. Happy automating!